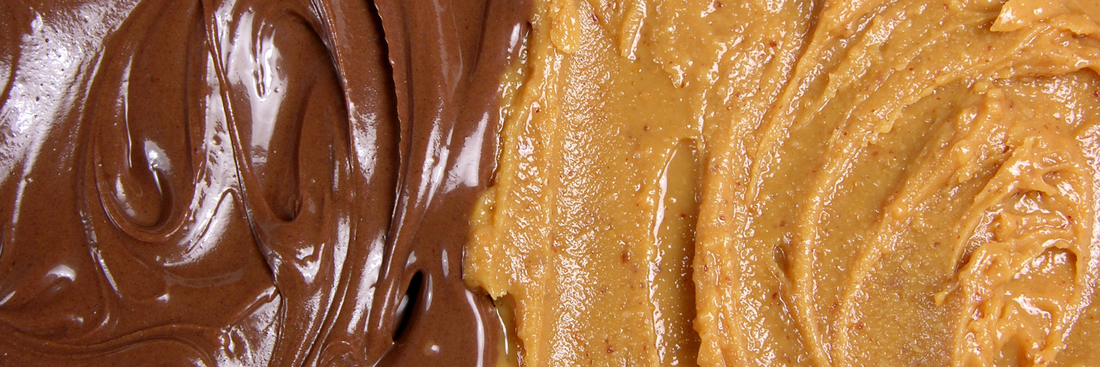
This homemade chocolate cashew butter recipe is about to save you money, reduce your ingredient label anxiety, and give you serious bragging rights. Using just five basic ingredients, cashews, cocoa powder, a natural sweetener, vanilla, and a pinch of salt, you'll create a creamy, rich chocolate spread that rivals any gourmet version. It's naturally vegan, gluten-free, and completely customizable to your taste preferences. Whether you spread it on toast, swirl it into smoothies, or eat it straight from the jar at midnight (I don't judge), this easy recipe delivers maximum flavor with minimal effort.
Why Chocolate Cashew Butter Is Your New Obsession
Let me paint you a picture: it's Saturday morning, you've got a slice of warm sourdough toast, and you're reaching for something to spread on it. You could grab that jar of commercial chocolate hazelnut spread with its palm oil and refined sugar, or you could reach for your homemade chocolate cashew butter, creamy, naturally sweet, and made with ingredients you can actually pronounce. The choice seems obvious once you've tasted the homemade version.
But beyond the superior taste, there's something deeply satisfying about making your own nut butter. It's one of those kitchen projects that seems intimidating until you try it, and then you realize it's been accessible all along. Plus, you can customize everything, the sweetness level, the chocolate intensity, even the texture, to create your perfect spread.
The Cashew Advantage (Why Not Almonds or Peanuts?)
Here's where I need to geek out for a moment about why cashews are the MVP of homemade chocolate nut butter. I've made chocolate almond butter (delicious but requires patience and possibly divine intervention to get smooth), chocolate peanut butter (tasty but can be a bit heavy), and various other nut combinations. Cashews, though? They're playing a different game entirely.
Cashews have a naturally mild, slightly sweet flavor that doesn't compete with the chocolate, instead, they create this neutral, creamy base that lets the cocoa powder shine. Their texture is inherently smoother than almonds because cashews have a lower fiber content and higher natural fat content. This means they break down faster in the food processor and achieve that silky, spreadable consistency without needing to add extra oil. When I made almond butter, I was blending for nearly 20 minutes; with cashews, you're looking at 10-12 minutes tops.
Another practical advantage: cashews are softer than almonds, which means less wear and tear on your food processor. My first food processor actually started smoking when I was making almond butter (don't worry, I've upgraded since), but cashews are much gentler on your equipment. They also have less of that "raw nut" taste that some people find off-putting in homemade nut butters, so even if you skip the roasting step, you'll still get a pleasant, mild nutty flavor.
Health Benefits You'll Actually Care About
I'm not going to pretend that chocolate cashew butter is a health food in the sense that you should eat the whole jar for dinner (though I won't judge if you've considered it). But compared to commercial chocolate spreads, the nutritional profile is genuinely impressive. Let's break down why this homemade version is better for you:
Healthy Fats and Protein: Cashews are packed with monounsaturated fats, the same heart-healthy fats found in olive oil and avocados. A two-tablespoon serving delivers about 5 grams of protein and 13 grams of healthy fats that actually keep you satisfied. Compare this to typical commercial chocolate spreads where sugar is often the first or second ingredient, and you're looking at a completely different nutritional story.
No Refined Sugar (Your Choice): When you make chocolate cashew butter at home, you control the sweetener. I typically use maple syrup or a few pitted dates, which add natural sweetness plus minerals and fiber. You can also use coconut sugar, honey (if you're not vegan), or even skip the added sweetener entirely if you prefer a dark chocolate vibe. The commercial alternative? Often loaded with refined white sugar or high-fructose corn syrup.
Peanut-Free Alternative: For families dealing with peanut allergies, finding safe, delicious spreads can be challenging and expensive. Chocolate cashew butter solves this problem beautifully, it's naturally peanut-free, and because you're making it at home, you control the entire process and avoid cross-contamination concerns.
Complete Ingredient Control: This might be the biggest health advantage of all. When I flip over a commercial jar and see palm oil (often not sustainably sourced), artificial flavors, and emulsifiers, I can't help but think, "Why do I need all this stuff?" Homemade chocolate cashew butter typically contains five ingredients: cashews, cocoa powder, sweetener, vanilla, and salt. That's it. You know exactly what you're eating.
Here's a comparison table to illustrate the difference:
| Component | Homemade Chocolate Cashew Butter | Commercial Chocolate Hazelnut Spread |
|---|---|---|
| Primary ingredient | Cashews (70-80%) | Sugar, palm oil |
| Added sugars | 1-2 tbsp natural sweetener per batch | 21g per 2 tbsp serving |
| Healthy fats | 13g per serving (mostly monounsaturated) | 11g per serving (includes palm oil) |
| Protein | 5g per serving | 2g per serving |
| Preservatives | None (natural shelf life) | Soy lecithin, vanillin |
| Customizable | Completely | Not at all |

What You'll Need (Ingredients & Equipment)
One of the best things about making chocolate cashew butter is the ingredient list's beautiful simplicity. You probably have half of these items in your pantry already, and the rest are easy to find at any grocery store. I've made this recipe at least twenty times now, testing variations and learning from mistakes, so I can guide you toward the best choices.
Essential Ingredients
Cashews (2 cups, about 280 grams): This is your base, your foundation, your star player. You can use either raw or roasted cashews, both work beautifully, though they'll give you slightly different flavor profiles. Raw cashews create a milder, more neutral-tasting butter that lets the chocolate really shine. Roasted cashews (which I prefer) add a deeper, toastier flavor with a hint of caramelization that pairs gorgeously with dark cocoa.
Buy whole cashews rather than pieces if possible. While pieces will technically work, whole cashews tend to be fresher, and you'll get a smoother final texture. I usually grab the unsalted variety from the bulk bins at my local store, it's cheaper, and I can control the salt level in the final recipe.
Cocoa Powder or Cacao Powder (3-4 tablespoons): Here's where the chocolate magic happens. I've tested this recipe with both Dutch-processed cocoa powder and natural cocoa powder, and honestly, both work great. Dutch-processed gives you a darker color and slightly mellower chocolate flavor, while natural cocoa is a bit brighter and more intense. Use what you have or what you prefer.
If you want to get fancy, raw cacao powder works beautifully and adds extra antioxidants, though it's pricier. Start with 3 tablespoons and taste before adding more, you can always add, but you can't subtract. I learned this the hard way when I dumped in 5 tablespoons on my third attempt and created something that tasted like chocolate-covered sadness.
Sweetener (2-3 tablespoons): This is where you get to customize based on your preferences and dietary needs. My go-to is pure maple syrup because it blends smoothly, adds a subtle depth of flavor, and keeps the recipe vegan. But I've also had excellent results with:
- Honey (if you're not vegan): Creates a slightly floral sweetness
- Pitted Medjool dates (3-4 dates): Adds caramel notes and keeps everything whole-food
- Coconut sugar: Gives a slight molasses flavor
- Stevia or monk fruit: For low-sugar versions (though I find these can leave a slight aftertaste)
Salt (1/4 teaspoon): Never skip the salt. I made this mistake once, thinking "how much difference could it make?" and the answer is A LOT. Salt enhances the chocolate flavor, balances the sweetness, and transforms the cashew butter from "nice" to "where has this been all my life?" I use fine sea salt, but regular table salt works fine too.
Optional but Recommended:
- Vanilla extract (1 teaspoon): Adds warmth and rounds out the chocolate flavor
- Coconut oil (1-2 tablespoons): Creates an ultra-silky texture and helps with spreadability, especially if you're refrigerating
- Dark chocolate chips (1/4 cup): For a more intense chocolate hit, melt and blend in
- Cinnamon or espresso powder: Just a pinch adds complexity
Equipment You Probably Already Have
Food Processor or High-Speed Blender: This is your main piece of equipment, and I won't lie, quality matters here. I've successfully made cashew butter in a basic 7-cup food processor, but it took longer and required more scraping. A food processor with at least a 600-watt motor will handle this job much better.
High-speed blenders like Vitamix or Blendtec work great, though you might need to use the tamper to keep things moving. Standard blenders struggle with this recipe because the cashews are too thick, I tried once in my old smoothie blender and ended up with cashew dust permanently welded to the bottom.
Rubber Spatula: Essential for scraping down the sides of your food processor. You'll do this multiple times during the process, and a good flexible spatula makes the job much easier. I like silicone spatulas because nothing sticks to them.
Storage Jar: You'll need an airtight container for storing your finished chocolate cashew butter. I use clean glass jars, either 8-ounce mason jars or recycled nut butter jars. Make sure whatever you use has a tight-fitting lid because you'll be opening it frequently (trust me, this stuff is addictive).
Baking Sheet (If Roasting): If you're roasting your own cashews (highly recommend), you'll need a rimmed baking sheet. Line it with parchment paper for easy cleanup.
Optional: Measuring cups, measuring spoons, kitchen scale (if you want to be precise), oven thermometer (if your oven runs hot or cold).
How to Make Chocolate Cashew Butter (Step-by-Step)
Alright, this is where the magic happens. I'm going to walk you through each step, including the parts where you might panic and think it's not working. Spoiler: it's working. Nut butter just requires patience, which is ironic because I have approximately zero patience in most areas of my life.
Step 1: Roast Your Cashews (Or Don't - Here's When to Skip)
If You're Roasting (Recommended):
Preheat your oven to 350°F (175°C). While it's heating, spread your 2 cups of raw cashews in a single layer on a parchment-lined baking sheet. You want them spread out, not piled up, crowded cashews roast unevenly, and nobody wants half-raw, half-burnt nuts.
Roast for 8-10 minutes, stirring once at the halfway point. Watch them carefully after the 7-minute mark because cashews can go from "perfectly golden" to "bitter and burnt" in about 90 seconds. I learned this while I was answering a text message and came back to a kitchen filled with smoke. Not my finest moment.
You'll know they're done when they smell nutty and toasty (in a good way), and they've turned a light golden color. They might not look that different, but touch one, it should feel warm and slightly darker than when you started.
Let them cool for about 5-10 minutes before blending. I know you're excited to make butter, but hot cashews will create a slightly oily, separated mess instead of the creamy spread you're after. I made this mistake on attempt number two.
When to Skip Roasting:
You can absolutely use raw cashews if you prefer a milder flavor or if you're short on time. Some people like the more neutral taste of raw cashew butter, it creates a cleaner chocolate flavor without the competing toasty notes. You can also buy pre-roasted, unsalted cashews if you want the roasted flavor without the extra step. Just make sure they're not heavily salted or seasoned.
Step 2: The Blending Process (Patience, Grasshopper)
This is the part where many people give up too early, so I'm going to prepare you for what to expect. Making cashew butter is like a caterpillar turning into a butterfly, there's an awkward middle stage, but the end result is beautiful.
Minutes 0-2: The Gravel Pit Add your cooled cashews to your food processor. Hit pulse a few times to break them down, then let it run continuously. At this stage, your cashews will look like coarse sand or gravel. They'll be bouncing around, making noise, and you'll think, "This is never going to work." Keep going. This is completely normal.
Minutes 2-4: The Clump Stage Your cashew gravel will start clumping together into balls or a single mass that rotates around the food processor. This is actually progress, it means the cashews are starting to release their oils. Resist the urge to add liquid at this point. I made this mistake on my first attempt, adding coconut oil too early, and it actually slowed down the butter-making process.
Stop the processor and scrape down the sides and bottom with your rubber spatula. You'll be amazed at how much cashew mixture gets stuck to the sides. Scrape thoroughly, then resume processing.
Minutes 4-7: The Breakthrough This is where the magic starts happening. The clumpy mass will suddenly start looking wet and paste-like. It'll cling to the sides less and start forming a thicker, more cohesive mass. The texture will shift from "Play-Doh" to "thick paste." You're getting close now.
Scrape down the sides again. At this point, I usually take a small taste to check the texture, it should be slightly gritty but starting to feel creamy on your tongue.
Minutes 7-10: Butter Emerges The paste will suddenly start flowing and moving like actual nut butter. It'll become glossy, smooth, and start dripping down the sides of the food processor. When you stop the machine, it should slowly flow back down like lava. This is the stage you're looking for before adding the chocolate ingredients.
If you're still at a thick paste stage after 10 minutes, don't panic. Let your food processor rest for a minute (it might be getting hot), scrape down the sides really well, and process for another 2-3 minutes. Some factors that affect timing: the moisture content of your cashews, the power of your food processor, and whether your cashews were roasted or raw.
Troubleshooting: "Help! It's Not Getting Creamy"
If you've been blending for 12+ minutes and you're still at the gravel or clump stage, here are the likely culprits:
- Your food processor isn't powerful enough: Sadly, some machines just can't handle this task. You can try adding 1 tablespoon of neutral oil (avocado or light olive oil) to help things along.
- You didn't use enough cashews: Food processors need a certain volume to work efficiently. Two cups is usually the minimum.
- Your cashews are stale: Old cashews have less natural oil and won't blend as smoothly. They'll work, but you might need to add a bit of oil.
- The machine is overheating: Let it rest for 5 minutes and try again.
Step 3: Add the Chocolate Magic
Once your cashew butter is smooth and flowing, it's time to add the chocolate and transform this from "nice cashew butter" to "oh my god I'm eating this with a spoon right now" status.
Add your cocoa powder (start with 3 tablespoons), sweetener of choice (I use 2-3 tablespoons maple syrup), vanilla extract (1 teaspoon), and salt (1/4 teaspoon). If you're using coconut oil for extra smoothness, add 1-2 tablespoons now.
Process for another 1-2 minutes until everything is fully incorporated and uniform. The mixture will thicken slightly as the cocoa powder absorbs some of the oil, this is normal. Scrape down the sides one more time to ensure everything is mixed.
Taste and Adjust:
This is my favorite part. Grab a spoon and taste your creation. Does it need more chocolate? Add another tablespoon of cocoa powder and blend briefly. Too bitter? Add more sweetener, a tablespoon at a time. Want it more intensely chocolate? Melt 1/4 cup of dark chocolate chips and blend those in. Not quite sweet enough? A pinch more salt might actually be what it needs, salt enhances sweetness and chocolate flavor.
I usually go through three or four taste tests before I'm satisfied. This is why I rarely have the full yield written below, I eat at least two spoonfuls during the "testing" phase.
Optional Add-Ins:
This is where you can get creative and make the recipe your own:
- Espresso powder (1/2 teaspoon) for a mocha version
- Cinnamon (1/4 teaspoon) for warmth
- A pinch of cayenne for spicy chocolate
- Orange zest for chocolate-orange flavor
- A handful of mini chocolate chips for texture
- Toasted coconut flakes for a tropical twist
Step 4: Storage & Shelf Life
Transfer your chocolate cashew butter to a clean, airtight glass jar. I like to use a jar with a wide mouth because it makes scooping easier. You can store it at room temperature for up to one week, or refrigerate for up to one month.
Room Temperature vs. Refrigeration:
At room temperature, your chocolate cashew butter will stay soft and spreadable, perfect if you're planning to use it within a week. However, because homemade nut butter doesn't contain preservatives, it can go rancid faster, especially in warm weather.
Refrigeration extends the shelf life significantly (up to a month), but your butter will firm up considerably. It'll still taste amazing, but you might need to let it sit at room temperature for 10-15 minutes before using, or you can microwave it for about 10-15 seconds to soften. I keep mine in the fridge because I live in a hot climate, and I've gotten used to the firmer texture.
Oil Separation Fixes:
You might notice a thin layer of oil separating from your butter over time, especially if it's been sitting for a while. This is totally normal, natural nut butters separate because they don't contain emulsifiers. Simply stir it back together with a spoon or butter knife before using.
If your butter seems excessively oily and separates immediately, it means your cashews released more oil during processing than expected. Next time, try adding an extra tablespoon of cocoa powder to absorb some of that oil, or reduce any added coconut oil.

Common Mistakes (And How I Learned the Hard Way)
Mistake 1: Over-Roasting the Cashews
On my fourth or fifth attempt, I was feeling cocky and decided to roast the cashews for "just a couple extra minutes" to get more flavor. What I got instead was bitter, slightly burnt cashew butter that no amount of chocolate could salvage. I actually threw that batch away, it was that bad.
The fix: Set a timer and don't walk away from the oven after the 7-minute mark. Your cashews should be lightly golden and smell nutty, not dark brown and smoking.
Mistake 2: Adding Liquids Too Early
In my eagerness to speed up the process, I once added maple syrup during the clumpy stage, thinking it would help things blend faster. It did not. Instead, it coated the cashew clumps and actually prevented them from breaking down properly. The syrup just got absorbed into the clumps, and I ended up with weirdly sweet cashew lumps instead of smooth butter.
The fix: Wait until you have smooth, flowing cashew butter before adding any liquid ingredients (maple syrup, vanilla, coconut oil).
Mistake 3: Not Scraping Down the Sides
During one particularly rushed attempt, I just let the food processor run for the full time without stopping to scrape. Big mistake. I ended up with beautifully smooth cashew butter in the center and a ring of dry, powdery cashew dust stuck to the sides. When I finally scraped it all together, the texture was inconsistent and grainy.
The fix: Stop and scrape at least 3-4 times during the process. Yes, it's annoying to keep stopping, but those 30 seconds of scraping make the difference between mediocre and magnificent cashew butter.
Mistake 4: Using the Wrong Blender
I once tried making this in my basic smoothie blender (not a high-speed one) because my food processor was in the dishwasher. After 15 minutes of the motor straining and making concerning noises, I had cashew dust permanently stuck to the blades and no butter to show for it. I think I may have shortened that blender's lifespan by several years.
The fix: Use a food processor with at least 600 watts of power, or a high-speed blender like a Vitamix. Regular blenders aren't designed for this kind of thick processing.
Mistake 5: Giving Up Too Soon
My very first attempt, I stopped after 5 minutes because "nothing was happening" and the mixture looked like it would never become smooth. I actually walked away and started scrolling through my phone, convinced I'd wasted $8 worth of cashews. Twenty minutes later, I gave it one more try, and within 3 more minutes, I had gorgeous, flowing cashew butter. I felt so silly for giving up when I was so close.
The fix: Trust the process. If you're between 8-12 minutes and things still look chunky, keep going. The transformation can happen quite suddenly.
Flavor Variations to Try
Once you've mastered the basic chocolate cashew butter, the world of variations opens up. Here are my favorite twists that I've developed through experimentation:
Dark Chocolate Lover's Version
Use 5 tablespoons of dark cocoa powder (instead of 3-4), reduce the sweetener to 1-2 tablespoons, and add 1/4 cup of melted 70% dark chocolate. This creates an intensely chocolatey, sophisticated spread that's less sweet and more "grown-up." I love this version on whole grain toast with sea salt sprinkled on top, or stirred into Greek yogurt for a protein-rich dessert.
White Chocolate Cashew Butter
Skip the cocoa powder entirely and melt 1/2 cup of white chocolate chips. Blend them into your cashew butter while the chocolate is still warm (but not hot, you don't want to seize the butter). Add an extra 1/2 teaspoon of vanilla extract and a tiny pinch of cardamom. This version is incredible as a fruit dip or spread on banana bread. Fair warning: it's very sweet, so I usually reduce or eliminate any additional sweetener.
Mocha Cashew Butter (My Personal Favorite)
Add 1 tablespoon of instant espresso powder or very finely ground coffee along with your cocoa powder. The coffee enhances the chocolate flavor in this magical way that makes it taste more intensely chocolatey without being overwhelming. I spread this on morning toast with sliced bananas, and it's become my favorite breakfast. The coffee flavor isn't strong, it just creates this deep, rich complexity.
Salted Caramel Chocolate Cashew
Here's where things get fancy. Make your basic chocolate cashew butter, but use coconut sugar as your sweetener (3-4 tablespoons). Add an extra 1/2 teaspoon of sea salt and 1/4 teaspoon of cinnamon. The coconut sugar has natural caramel notes that, combined with the salt and cinnamon, create this almost salted-caramel flavor. Drizzle this over vanilla ice cream and thank me later.
Peppermint Chocolate (Holiday Version)
Add 1/2 teaspoon of pure peppermint extract along with your vanilla. Start with less, peppermint extract is potent, and you can always add more. I make a big batch of this in December and give jars as gifts. Pro tip: stir in some crushed candy canes at the very end for texture and extra peppermint flavor.
Hazelnut-Cashew Hybrid (Nutella Style)
Replace 1 cup of the cashews with 1 cup of roasted hazelnuts. The hazelnuts add that classic Nutella flavor, while the cashews keep everything smooth and creamy (hazelnuts alone can be quite thick). Use a bit more sweetener (4 tablespoons) to mimic that Nutella sweetness. This version is the closest to the commercial spread but infinitely better quality.
Spicy Mexican Hot Chocolate
Add 1/2 teaspoon of cinnamon, 1/4 teaspoon of cayenne pepper (or more if you like heat), and a tiny pinch of nutmeg. The warmth of the spices combined with the chocolate creates this complex, warming spread that's incredible on churros or graham crackers.
Texture Customization
Not everyone wants the same consistency in their nut butter, and that's the beauty of making it yourself, you can customize the texture exactly how you like it.
Ultra-Smooth and Silky
If you want the smoothest possible texture (like commercial nut butter), blend for the full 12 minutes and add 2 tablespoons of refined coconut oil or MCT oil. The extra fat creates an incredibly silky, almost liquid consistency. This is my preferred texture for drizzling over ice cream or swirling into oatmeal.
Slightly Chunky
Stop blending when you reach the butter stage, then pulse in an additional 1/4 cup of roughly chopped cashews. This gives you a smooth base with little chunks throughout. I love this texture for spreading on toast because it adds a bit of crunch.
Thick Spread vs. Runny Drizzle
The amount of fat (both natural and added) affects consistency. For a thicker spread that holds its shape, use less or no coconut oil and blend for less time (8-10 minutes). For a pourable, drizzle-able consistency, add 2-3 tablespoons of coconut oil and blend until very smooth (12+ minutes). I actually keep two jars in my fridge, thick spread for toast and thin drizzle for desserts.
Temperature Tricks
Remember that your chocolate cashew butter will be at its thinnest right after making it, when the friction from blending has warmed everything. It'll thicken as it cools. If you want a specific consistency, let it cool completely before deciding if you need to adjust. I once added extra coconut oil thinking my butter was too thick, only to have it turn into liquid once the added oil was incorporated.
Ways to Use Your Chocolate Cashew Butter
Alright, so you've made this gorgeous chocolate cashew butter, now what? Beyond the obvious (eating it straight from the jar with a spoon at midnight, which I absolutely do not do regularly), here are some of my favorite ways to use it:
Breakfast & Toast Ideas
- Classic: Spread on whole grain toast with sliced strawberries and a drizzle of honey
- Fancy: Toasted sourdough + chocolate cashew butter + fresh figs + a sprinkle of flaky sea salt
- Decadent: Waffles or pancakes with chocolate cashew butter instead of syrup
- Quick: Spread on a rice cake with banana slices (my go-to when I'm running late)
- Overnight oats: Stir a tablespoon into your oats for chocolate-y breakfast perfection
Smoothie Booster
Add 2 tablespoons to your morning smoothie for protein, healthy fats, and chocolate flavor. My favorite combination: frozen banana, chocolate cashew butter, a handful of spinach (I know, but you can't taste it), almond milk, and a scoop of protein powder. It tastes like a chocolate milkshake but actually keeps you full until lunch.
Dessert Ingredient
This is where chocolate cashew butter really shines:
- Swirl it into brownie batter before baking
- Use it as a filling for homemade chocolates
- Spread between cookie layers for sandwich cookies
- Mix into cheesecake batter for chocolate cashew cheesecake
- Fold into whipped cream for the most decadent fruit dip
- Make chocolate cashew butter cups (just like peanut butter cups but better)
Fruit Dip
Apple slices, strawberries, banana chunks, even pear slices, all incredible dipped in chocolate cashew butter. I like to thin the butter slightly with a little almond milk to make it more dip-able. This is my party trick when I need to bring something to gatherings. Everyone thinks I'm fancy, but it's just nut butter and fruit.
Straight-from-the-Jar Moments (No Judgment)
Look, sometimes you just need a spoonful of something sweet and satisfying. I keep a dedicated spoon in my jar for these moments. It's rich enough that a tablespoon actually satisfies the craving, unlike when I eat half a bag of chocolate chips trying to scratch that chocolate itch.
Baking Applications
- Substitute for peanut butter in any recipe (cookies, bars, etc.)
- Swirl into muffin or quick bread batter
- Use as a filling for thumbprint cookies
- Spread between cake layers
- Mix into frosting for chocolate cashew buttercream
Gift Idea
Here's a secret: homemade chocolate cashew butter in a pretty jar with a ribbon makes you look like a culinary genius. I made a batch for my neighbor's birthday, and she told everyone I was "basically a chef." I'm not, but I let her believe it. Package it with some homemade granola or cookies, and you've got a gift that actually feels personal and thoughtful.
Chocolate Cashew Butter vs Other Nut Butters
I've spent an embarrassing amount of time making and comparing different chocolate nut butters (all in the name of research, obviously), so let me break down how chocolate cashew butter stacks up against the alternatives:
| Attribute | Chocolate Cashew Butter | Chocolate Almond Butter | Nutella | Chocolate Peanut Butter |
|---|---|---|---|---|
| Texture | Ultra-creamy, smooth, flows easily | Dense, slightly grainy even when smooth | Very smooth, almost whipped | Thick, holds shape well |
| Flavor Profile | Mild, sweet, chocolate-forward | Nutty, slightly bitter undertones, assertive | Very sweet, cocoa flavor is mild | Strong peanut flavor, chocolatey |
| Ease of Making | Easy, 10-12 minutes processing | Moderate, 15-20+ minutes, needs patience | N/A (commercial) | Easy, 8-10 minutes |
| Natural Sweetness | Naturally slightly sweet cashews | More neutral, less sweet | Very sweet (sugar is main ingredient) | Peanuts have earthy, not sweet, flavor |
| Price Per Batch | $7-10 (cashews are pricey) | $6-8 | $5-7 per jar | $4-6 (peanuts cheapest) |
| Allergen Status | Tree nut (cashew), peanut-free | Tree nut (almond), peanut-free | Contains tree nuts (hazelnut) | Contains peanuts |
| Protein (per 2 tbsp) | ~5g | ~7g | ~2g | ~8g |
| Healthy Fats | High in monounsaturated | High in monounsaturated | Contains palm oil | High in monounsaturated |
| Added Preservatives | None in homemade | None in homemade | Soy lecithin, vanillin | None in homemade |
| Best Used For | Toast, desserts, smoothies, everything | Baking, hearty applications | Spreading (but nutritionally poor) | Sandwiches, baking |
| Refrigeration Needed? | Optional (lasts longer with) | Yes (tends to separate) | No (preservatives) | Optional |
My Honest Take:
If you want the smoothest, most versatile chocolate nut butter with the least effort, cashew wins hands down. Chocolate almond butter is delicious but requires serious patience and a powerful food processor, I've made it many times, and it's always a test of willpower to keep blending long enough.
Chocolate peanut butter is great if you love peanut flavor, but it's very assertive. The peanut taste dominates, whereas cashew lets the chocolate shine. Plus, peanut butter is something most people already have, so chocolate cashew butter feels more special.
As for Nutella and commercial spreads, they're convenient but can't compete nutritionally. Plus, once you've tasted homemade chocolate nut butter with real ingredients, the commercial stuff tastes almost artificial by comparison. I'm not saying never eat Nutella again (I'm not a monster), but homemade is objectively better.

Frequently Asked Questions (People Also Ask)
Can I make chocolate cashew butter without a food processor?
Yes, but your options are limited and it's definitely more challenging. A high-speed blender like a Vitamix or Blendtec works beautifully, you'll need to use the tamper to keep pushing the cashews down toward the blades. The key is having enough volume (at least 2 cups of cashews) and a powerful enough motor.
Regular blenders won't work, I've tried, and you'll just burn out the motor or end up with cashew dust. A hand blender or immersion blender also won't work; they're not designed for this type of thick processing.
If you don't have either a food processor or high-speed blender, you could technically use a mortar and pestle, but I'm going to be honest: it would take approximately forever, your arms would fall off, and the result wouldn't be nearly as smooth. At that point, just buy prepared cashew butter and stir in cocoa powder and sweetener.
How long does homemade cashew butter last?
At room temperature in an airtight container, homemade chocolate cashew butter stays fresh for about one week. Because it doesn't contain preservatives, it can go rancid faster than commercial nut butters, especially in warm weather.
Refrigerated, it lasts up to one month, sometimes slightly longer if you're very careful about using clean utensils every time (no double-dipping with spoons that have touched other foods). I once had a jar last six weeks in the fridge, though the flavor did start to fade slightly toward the end.
You can also freeze chocolate cashew butter for up to three months. Spoon it into ice cube trays, freeze until solid, then transfer the cubes to a freezer bag. This is perfect for adding to smoothies or thawing small amounts as needed.
Signs your cashew butter has gone bad: off smell (rancid or sour), mold on the surface, or a bitter, unpleasant taste. When in doubt, throw it out, though honestly, in my house, a jar has never lasted long enough to go bad.
Why is my cashew butter grainy or not smooth?
Graininess in homemade cashew butter usually comes from one of these issues:
You didn't blend long enough: This is the most common culprit. Cashew butter needs to go through several distinct stages before becoming truly smooth, gravel, clumps, thick paste, and finally flowing butter. If you stop at the thick paste stage, it'll feel grainy. Keep processing for another 2-3 minutes and scrape down the sides thoroughly.
Your cashews were old or stale: Older cashews have less natural oil, which means they don't break down as smoothly. They'll eventually become butter, but the texture might remain slightly grainy. Fresh cashews from a store with good turnover work best.
The cocoa powder wasn't fully incorporated: If you add cocoa powder to cashew butter that isn't completely smooth, the cocoa can create little pockets of graininess. Make sure your cashew butter is perfectly smooth before adding any other ingredients.
Temperature issues: Cashew butter needs to be warm to reach peak smoothness. The friction from blending creates heat, which helps the oils flow. If you stop and start too many times, letting everything cool down, it can affect the texture.
Fix: If your finished butter is grainy, put it back in the food processor and blend for another 3-5 minutes. You can add 1 tablespoon of coconut oil or neutral oil to help things along.
Can I use cocoa powder instead of melted chocolate?
Absolutely, in fact, cocoa powder is my preferred method! It's easier, doesn't require melting or tempering, and gives you more control over the chocolate intensity. Cocoa powder also doesn't add extra fat, so your cashew butter maintains its thick, spreadable consistency.
Melted chocolate works too, but it can make the butter slightly grainier (chocolate contains cocoa solids and cocoa butter that don't fully blend in) and adds extra sweetness if you're using anything other than 100% cacao chocolate. If you do use melted chocolate, add it while it's still warm (but not hot) and blend thoroughly.
I usually use cocoa powder for everyday batches and save the melted chocolate for special occasions when I want a more intense, truffle-like experience.
Is chocolate cashew butter healthier than Nutella?
Yes, significantly healthier, but let me break down exactly why so you can make informed choices:
Sugar content: A typical 2-tablespoon serving of Nutella contains about 21 grams of sugar. My homemade chocolate cashew butter contains about 3-5 grams (depending on how much sweetener you add), and that's from natural sources like maple syrup rather than refined sugar.
Quality fats: Nutella's first ingredient after sugar is palm oil, which is high in saturated fat and often not sustainably sourced. Chocolate cashew butter contains the natural fats from cashews, primarily heart-healthy monounsaturated fats that actually benefit your cardiovascular system.
Protein: Homemade chocolate cashew butter has about 5 grams of protein per serving versus 2 grams in Nutella. The protein comes from the cashews themselves, not from added milk powder.
Real ingredients: Homemade versions contain about 5 recognizable ingredients. Nutella contains sugar, palm oil, hazelnuts, cocoa, skim milk powder, soy lecithin, and vanillin (synthetic vanilla). It's also worth noting that the hazelnut content is only about 13%.
That said: Nutella is convenient, shelf-stable, and less expensive. If you eat it occasionally and enjoy it, there's no reason to feel guilty. But for regular consumption, homemade chocolate cashew butter is objectively the better nutritional choice.
Do I need to add oil to cashew butter?
No, you don't need to add oil, cashews contain enough natural fat to become creamy on their own. That's actually one of the advantages of cashews over almonds, which sometimes need a little oil boost to reach peak smoothness.
However, adding 1-2 tablespoons of coconut oil or MCT oil can create an even silkier texture and help keep the butter more spreadable, especially if you're refrigerating it. The oil also helps prevent excessive separation over time.
I usually don't add oil to my basic recipe, but I will add a tablespoon if I'm making a batch specifically for drizzling over desserts or if it's summer and I know the butter will be sitting at warm room temperature (the extra oil keeps it fluid).
Can I make this recipe sugar-free?
Absolutely! The cocoa powder itself is sugar-free, and cashews have a naturally mild sweetness, so you can make this work without any added sweetener. Here are your best options:
Completely unsweetened: Just skip the sweetener entirely. The result is like a dark chocolate spread, bitter, intense, and sophisticated. I actually prefer this version stirred into plain Greek yogurt or spread on banana slices (the fruit provides the sweetness).
Sugar-free sweeteners: Stevia, monk fruit, or erythritol work well. Start with the equivalent of 2 tablespoons of sugar (check your sweetener's conversion chart) and adjust to taste. Fair warning: some sugar substitutes leave a slight aftertaste, so experiment to find one you like.
Date-sweetened: While dates technically contain natural sugars, they're whole food sources with fiber, minerals, and nutrients. Blend 3-4 pitted Medjool dates into your cashew butter before adding the cocoa. This gives you sweetness without refined sugar.
I make an unsweetened version for my diabetic uncle, and he loves it. He says it reminds him of European-style dark chocolate spreads that aren't as aggressively sweet as American versions.
What's the difference between raw and roasted cashews for butter?
Great question, because this genuinely affects both flavor and process:
Roasted cashews:
- Deeper, more complex, slightly caramelized flavor
- Blend slightly faster (roasting breaks down some cell walls)
- Create a warmer, toastier-tasting final product
- Less "raw nut" flavor
- My personal preference for chocolate cashew butter
Raw cashews:
- Milder, more neutral flavor that lets chocolate dominate
- Take slightly longer to blend into smooth butter
- Lighter color in the final product
- Some people find them easier to digest
- Better if you want a "pure" chocolate flavor without competing nutty notes
Processing note: Whether you use raw or roasted, the blending process is essentially the same. Raw cashews might take an extra 1-2 minutes to reach the flowing butter stage, but the difference is minimal.
Which should you choose? If you love the flavor of roasted nuts and want a more complex spread, go roasted. If you prefer a cleaner chocolate flavor or you're planning to add lots of other flavorings, raw works beautifully.
Can I substitute other nuts for cashews?
You can, but the results will be quite different. Here's what happens with common substitutions:
Almonds: Will work but require significantly more blending time (15-20 minutes) and may never get as smooth as cashews. Almonds have more fiber and less fat, so they create a thicker, slightly grainy butter. You might need to add 1-2 tablespoons of oil to help things along.
Hazelnuts: Work well and create that classic Nutella flavor. However, hazelnuts alone make quite a thick butter. I recommend doing half cashews, half hazelnuts for the best texture.
Peanuts: Definitely work and blend quickly, but you'll get chocolate peanut butter (obviously). The flavor is great but very different from the mild, sophisticated taste of cashew butter.
Macadamias: These work wonderfully and create an incredibly rich, buttery spread. However, macadamias are extremely expensive, so unless you're making this as a luxury gift, it's probably not practical.
Mixed nuts: I've experimented with combinations, my favorite is 1 cup cashews + 1 cup almonds, which gives you cashew creaminess with almond depth.
Bottom line: You can substitute, but cashews are really the MVP for achieving that perfect creamy texture with minimal effort.
Why does my cashew butter taste bitter?
Bitterness in chocolate cashew butter usually comes from one of these sources:
Over-roasted cashews: This is the most common cause. Cashews that got even slightly too dark in the oven will have a burnt, bitter flavor that permeates the entire batch. Watch your oven carefully and pull the cashews when they're just lightly golden.
Too much cocoa powder: Cocoa powder is naturally somewhat bitter, especially high-quality, unsweetened varieties. If you added more than 4 tablespoons or used extra-dark Dutch-processed cocoa, the bitterness might be overwhelming. Add another tablespoon of sweetener or a pinch more salt to balance it.
Not enough sweetener: Unsweetened chocolate cashew butter is quite bitter, it's like dark chocolate. If you used less sweetener than recommended, try stirring in more to taste.
Rancid cashews: Old, expired, or improperly stored cashews can develop an off, bitter flavor. Fresh cashews should smell mildly sweet and nutty, not sharp or sour.
Natural cocoa vs. Dutch-processed: Natural cocoa powder is more acidic and bitter than Dutch-processed. If you used natural and found it too bitter, try Dutch-processed next time.
Fix for current batch: Stir in more maple syrup, a tablespoon at a time, until the bitterness is balanced. A tiny pinch of salt can also help neutralize bitterness.
Final Thoughts: You've Got This
Here's the thing about making homemade chocolate cashew butter: it seems intimidating until you do it once, and then you wonder why you ever thought it was complicated. The first time I made it successfully (after that educational first attempt where I gave up too soon), I literally texted three friends to tell them about my achievement. They were politely enthusiastic, but I don't think they understood the magnitude of what I'd accomplished, which was transforming cashews into spreadable chocolate heaven.
Now, several years and countless batches later, I make chocolate cashew butter as casually as I make coffee. It's become one of those staple recipes that I return to over and over because it's reliable, delicious, and infinitely customizable. Some batches are dark and intense, others are sweet and kid-friendly, and sometimes I add espresso powder because I'm feeling fancy.
The beauty of homemade nut butters is that they're forgiving. If your first batch isn't perfect, you've still got perfectly edible chocolate spread, just maybe not Instagram-worthy smooth. And honestly? Even my "failed" batches (the ones that were a bit grainy or not sweet enough) still tasted better than most store-bought options.
So grab those cashews, fire up your food processor, and trust the process. When those clumpy cashew bits suddenly transform into flowing, glossy butter, you'll understand why I got so excited about this. And when you taste that first spoonful of your homemade chocolate cashew butter, creamy, chocolatey, and made entirely by you, you might just text three friends about it too.
Happy blending, and remember: patience is a virtue, but chocolate cashew butter is the reward.
READ MORE: