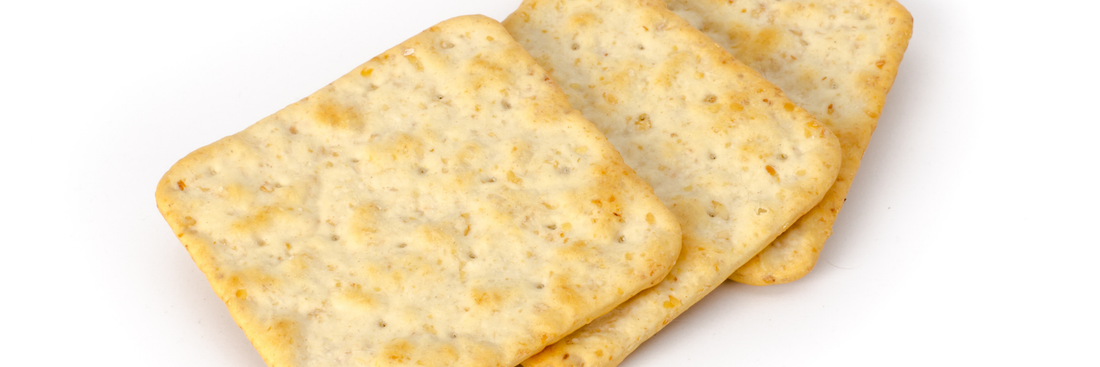
Craving that perfect crispy crunch without the mystery ingredients? Homemade vegan crackers are your answer! Whether you're looking for healthy vegan crackers, gluten-free options, or simply want to control what goes into your snacks, making your own is easier than you think. Store-bought crackers often hide dairy, eggs, and preservatives, but these simple vegan cracker recipes deliver incredible flavor with wholesome, plant-based ingredients. From classic rosemary sea salt to everything bagel variations, you'll discover how satisfying it is to bake your own artisan-quality crackers. Ready to transform simple pantry staples into the most delicious vegan snacks? Let's dive into the wonderful world of homemade vegan crackers!
Why Make Homemade Vegan Crackers?
Making your own vegan crackers might seem like extra effort when you can grab a box at the store, but once you experience the difference, you'll understand why so many people are embracing this simple kitchen project. The benefits go far beyond just having a tasty snack, you're taking control of your nutrition, saving money, and unleashing your culinary creativity all at once.
Healthier Ingredients You Can Control
When you make crackers at home, you become the ingredient gatekeeper. Store-bought crackers, even those labeled as vegan or healthy, often contain refined oils, excessive sodium, preservatives, artificial flavors, and added sugars that contribute little to your nutritional wellbeing. By making your own, you can choose whole grain flours that provide fiber and nutrients, use high-quality oils in moderation, control the salt level, and add seeds or herbs that boost the nutritional profile. You'll know exactly what's going into your body, which is especially important for people with food sensitivities, allergies, or those simply trying to eat cleaner. Plus, homemade crackers can be packed with protein-rich ingredients like chickpea flour, chia seeds, or hemp hearts, transforming a simple snack into something genuinely nourishing that keeps you satisfied longer.
Cost-Effective Compared to Store-Bought
The economics of homemade crackers are compelling. A typical box of artisan vegan crackers at a health food store can cost anywhere from five to ten dollars for just a few ounces. Meanwhile, the ingredients to make a large batch at home - flour, oil, seeds, and seasonings, usually total just a couple of dollars and yield significantly more crackers. When you break it down per serving, you're often spending less than a quarter of what you'd pay for commercial options. This becomes even more economical when you're feeding a family or entertaining guests. The initial investment in ingredients like nutritional yeast or specialty seeds pays off quickly as you use them across multiple batches. You can make crackers in bulk, store them properly, and have wholesome snacks available for weeks. For anyone on a budget who still wants to enjoy quality, flavorful snacks, homemade vegan crackers are an absolute game-changer that doesn't compromise on taste or nutrition.
Endless Flavor Customization
This is where homemade crackers truly shine, the flavor possibilities are limited only by your imagination! Love rosemary? Add fresh herbs directly to your dough. Craving something cheesy? Nutritional yeast delivers that savory, umami-rich flavor perfectly. Want a spicy kick? Mix in cayenne pepper, smoked paprika, or everything bagel seasoning. You can create herb-forward crackers for sophisticated cheese boards, seed-studded versions for extra crunch and nutrition, or even slightly sweet crackers with cinnamon and coconut sugar for pairing with nut butters. Unlike store-bought crackers that come in predetermined flavors, your homemade versions can match your exact preferences or complement specific dishes you're planning to serve. You can also experiment with different flour combinations, mixing whole wheat with chickpea flour for protein, using almond flour for richness, or incorporating oat flour for a subtle sweetness. This creative freedom makes cracker-making fun and ensures you'll never get bored with your snacks.
Perfect for Dietary Restrictions
One of the most practical advantages of homemade vegan crackers is their adaptability to various dietary needs. While vegan by definition means they're dairy-free and animal-free, you can easily modify recipes to accommodate other restrictions. Need gluten-free? Simply swap regular flour for certified gluten-free alternatives like rice flour, almond flour, or gluten-free oat flour with appropriate binding agents. Avoiding oil? You can create crispy crackers using applesauce, aquafaba, or extra ground flax seeds as moisture instead. Managing nut allergies? Stick with seed-based recipes using sunflower, pumpkin, or hemp seeds. Following a low-sodium diet? You control exactly how much salt goes in, or omit it entirely and rely on herbs and spices for flavor. This flexibility means everyone at your table can enjoy the same delicious snacks regardless of their dietary requirements. No more reading endless ingredient labels or feeling left out at gatherings, you can create crackers that work for your specific needs while still tasting absolutely delicious.

Essential Ingredients for Vegan Crackers
Understanding the role of each ingredient in your cracker recipe empowers you to experiment confidently and troubleshoot effectively. Vegan crackers rely on a simple framework of flour for structure, fat for flavor and texture, liquid for binding, and seasonings for taste. Let's break down the essential components and explore the options within each category.
Base Flours (Whole Wheat, All-Purpose, Almond, Chickpea)
Flour forms the structural foundation of your crackers, and choosing the right type dramatically affects the final texture and flavor. All-purpose flour is the most straightforward option, it creates reliable, crispy crackers with a neutral taste that works with any seasoning. Whole wheat flour adds nuttiness, fiber, and a heartier texture, though it can make crackers slightly denser, so many bakers use a combination of whole wheat and all-purpose for balance. Almond flour brings richness, healthy fats, and protein to crackers while creating a tender, slightly crumbly texture; it's particularly popular in gluten-free recipes but often needs to be combined with other flours for structural stability. Chickpea flour, also called gram flour or besan, offers an impressive protein boost and a distinct, savory flavor that works beautifully in crackers, especially when paired with herbs and garlic. For best results, many recipes combine two or more flours to achieve the ideal balance of nutrition, flavor, and texture, experimenting with these combinations is part of the fun!
Binding Agents (Flax Seeds, Chia Seeds, Oil)
Since vegan crackers don't use eggs, alternative binding agents are essential to hold the dough together. Ground flax seeds mixed with water create "flax eggs" that provide excellent binding power along with omega-3 fatty acids and fiber; use one tablespoon of ground flax mixed with three tablespoons of water to replace one egg. Chia seeds work similarly, forming a gel-like consistency when mixed with water that binds ingredients while adding nutrition; they're especially effective in seed-based crackers where their texture blends seamlessly. Oil serves double duty in cracker recipes, it adds richness and flavor while also helping bind the dough and create that desirable flaky, crispy texture. Olive oil is popular for its flavor and health benefits, while more neutral oils like avocado or grapeseed oil let other flavors shine. Some recipes use tahini or nut butters as binding agents, which contribute healthy fats and protein while creating a unique flavor profile. The key is finding the right balance, too little binding and your crackers will crumble apart; too much and they'll be tough or greasy.
Flavor Enhancers (Nutritional Yeast, Herbs, Spices)
This is where your crackers transform from basic to absolutely crave-worthy. Nutritional yeast is a vegan baker's secret weapon, these inactive yeast flakes deliver a cheesy, savory, umami-rich flavor that makes crackers taste incredibly indulgent without any dairy. Just two to four tablespoons can completely transform a batch, creating that "cheesy cracker" experience many people miss when going plant-based. Fresh or dried herbs add aromatic complexity; rosemary, thyme, oregano, basil, and dill all work beautifully in savory crackers. Garlic powder and onion powder provide depth without the moisture of fresh alternatives that could affect texture. Spices like smoked paprika, cayenne pepper, black pepper, cumin, or za'atar create distinctive flavor profiles that make your crackers truly special. Sea salt or kosher salt is essential for bringing out all the other flavors, flaky sea salt sprinkled on top before baking adds an upscale touch. Don't be afraid to get creative with combinations; the best crackers often feature a thoughtful blend of several complementary seasonings that create layers of flavor.
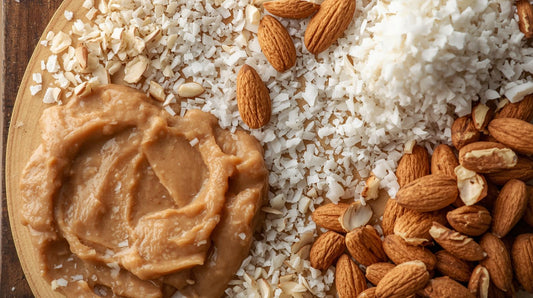
Seeds and Toppings (Sesame, Pumpkin, Sunflower)
Seeds serve multiple purposes in vegan crackers, they add crunch, boost nutrition, create visual appeal, and contribute unique flavors. Sesame seeds are classic for good reason; they provide a nutty taste and beautiful appearance when pressed into the dough surface. Pumpkin seeds, also called pepitas, add a satisfying crunch and are packed with magnesium, zinc, and healthy fats. Sunflower seeds offer a mild flavor and affordable nutrition boost. Hemp hearts bring complete protein and omega fatty acids with a subtle, nutty taste. Flax seeds and chia seeds can be sprinkled on top for visual interest and added fiber. Poppy seeds create a distinctive speckled appearance and mild flavor that pairs well with lemon or herbs. You can mix seeds directly into the dough for uniform distribution, press them into the surface before baking for texture contrast, or do both for maximum seed power. Beyond seeds, consider toppings like coarse sea salt, everything bagel seasoning, dried herbs, or even a light brush of olive oil before baking to help toppings adhere and add a golden sheen. These finishing touches make homemade crackers look and taste professionally crafted.
Basic Vegan Cracker Recipe (Master Recipe)
This foundational recipe is your starting point for cracker-making success. Once you master this simple version, you'll have the confidence to experiment with all the variations that follow. The beauty of this recipe is its flexibility, you can keep it plain and simple or customize it endlessly with your favorite seasonings. For a broader overview of cracker components, see Crackers Guide: Types, Nutrition Facts & Healthy Pairings.
Ingredients List
Dry Ingredients:
- 1 and 1/2 cups whole wheat flour (or all-purpose flour)
- 1/2 cup all-purpose flour
- 1/4 cup ground flax seeds
- 2 tablespoons nutritional yeast
- 1 teaspoon sea salt
- 1/2 teaspoon garlic powder
- 1/2 teaspoon onion powder
- Optional: 2 tablespoons sesame seeds or your choice of seeds
Wet Ingredients:
- 1/3 cup olive oil (or melted coconut oil)
- 1/2 cup cold water (plus more if needed)
- 1 tablespoon maple syrup or agave (optional, for slight sweetness and browning)
For Topping:
- Coarse sea salt
- Additional seeds
- Dried herbs
This recipe yields approximately 60-80 crackers depending on size. The combination of whole wheat and all-purpose flour provides great texture and flavor while remaining accessible. The flax adds nutrition and helps bind everything together, while nutritional yeast delivers that savory, almost cheesy note that makes these crackers absolutely addictive.
Step-by-Step Instructions
Mixing the Dough:
Start by preheating your oven to 350°F (175°C) and lining two large baking sheets with parchment paper, this prevents sticking and ensures easy cleanup. In a large mixing bowl, whisk together all your dry ingredients: both flours, ground flax seeds, nutritional yeast, salt, garlic powder, onion powder, and any seeds you're mixing into the dough. This thorough whisking ensures even distribution of seasonings so every cracker tastes consistent.
Create a well in the center of your dry ingredients and pour in the olive oil and water. Using a wooden spoon or your hands, mix everything together until a cohesive dough forms. The dough should come together into a ball and feel slightly moist but not sticky. If your dough feels too dry and won't hold together, add water one tablespoon at a time. If it's too sticky, incorporate a little more flour. The perfect cracker dough should be pliable and easy to work with, it shouldn't crack when you roll it, but it also shouldn't stick to your hands or rolling surface.
Once your dough comes together, knead it briefly in the bowl for about 30 seconds just to ensure everything is thoroughly combined. Let the dough rest for 5 minutes, this allows the flax seeds to absorb moisture and gives the flour time to hydrate, making the dough easier to roll out.
Rolling Technique:
Divide your dough in half for easier handling. Working with one half at a time, place the dough directly on your parchment-lined baking sheet. Place another piece of parchment paper on top of the dough, this prevents sticking and eliminates the need for extra flour that could make your crackers tough. Using a rolling pin, roll the dough as thin as possible, aiming for about 1/8 inch thick or even thinner if you can manage it. The thinner you roll the dough, the crispier your crackers will be. Don't worry if the dough doesn't cover the entire baking sheet in a perfect rectangle, irregular shapes have rustic charm!
For the thinnest, most uniform crackers, roll from the center outward, rotating the parchment and dough a quarter turn periodically to ensure even thickness. If you notice any thick spots, focus your rolling attention there. The edges often end up thinner than the center, which is fine, those edge pieces will just bake faster and become extra crispy.
Cutting Methods:
Here's where you can get creative with shapes! The simplest method is using a pizza cutter or sharp knife to cut the rolled dough into squares or rectangles. Score the entire sheet of dough without pulling apart the crackers, they'll naturally break along these lines after baking. For squares, cut parallel lines about 1.5 to 2 inches apart vertically, then do the same horizontally to create a grid pattern.
If you prefer round crackers, use a small cookie cutter or even the rim of a glass to cut circles. You'll need to gather and re-roll the scraps, but the presentation is lovely. For a more rustic, artisan look, break the dough into irregular pieces after baking.
Once your crackers are cut (but still on the parchment), use a fork to dock the surface, this means poking holes throughout each cracker. Docking prevents the crackers from puffing up during baking, ensuring they stay flat and crispy. Make several holes in each cracker piece.
Adding Toppings:
Before the crackers go into the oven, add your finishing touches. Lightly brush the surface with a bit of olive oil or water, this helps toppings adhere. Sprinkle with coarse sea salt, additional seeds, or dried herbs. Press the toppings gently into the dough with your hand or the bottom of a measuring cup so they don't fall off during baking. This is your chance to make these crackers truly special, so don't be shy with the toppings!
Baking Time and Temperature
Place your baking sheets in the preheated 350°F oven. Bake for 20-25 minutes, but start checking around the 15-minute mark. The exact timing depends on how thin you rolled your dough and your specific oven. You want the crackers to turn golden brown, especially around the edges. For even baking, rotate the baking sheets halfway through, move the bottom sheet to the top rack and vice versa, and spin each sheet 180 degrees.
Some crackers, especially those at the edges of the sheet, may brown faster than those in the center. This is completely normal. When the edge crackers are perfectly golden and crispy, remove the baking sheet from the oven and transfer those crackers to a cooling rack with a spatula. Return the remaining crackers to the oven for a few more minutes. This attentive approach ensures you don't end up with some burnt crackers while others remain undercooked.
If you're baking multiple sheets and they don't fit on separate racks, bake them one at a time for the most consistent results. The dough can wait at room temperature without any issues while the first batch bakes.
How to Tell When They're Done
Perfectly baked crackers should be golden brown in color with slightly darker, crispy edges. When you tap a cracker with your finger, it should feel firm and make a hard sound, no give or softness. Here's the trick: crackers will continue to crisp up as they cool, so they should feel almost completely crispy when they come out of the oven, but they'll achieve maximum crunch after cooling for 10-15 minutes.
If you're unsure, remove one cracker from the sheet and let it cool for a minute, then test it. If it's crispy and snaps easily, the batch is ready. If it bends without breaking or feels chewy, return the crackers to the oven for another 3-5 minutes. Remember that underbaked crackers will be disappointingly soft and chewy, while overbaked ones will taste burnt and bitter, so finding that golden sweet spot is key. With practice, you'll develop an intuition for perfect cracker doneness, but when in doubt, lean toward a little extra baking time, crispy is the goal!

5 Delicious Vegan Cracker Variations
Once you've mastered the basic recipe, it's time to have some fun! These five variations showcase the incredible versatility of homemade vegan crackers. Each one brings distinct flavors and personalities, perfect for different occasions and pairings.
1. Herbed Olive Oil Crackers
These crackers are elegantly simple and absolutely perfect for sophisticated cheese boards or serving alongside soups and salads. To make them, follow the basic recipe but add 2 tablespoons of finely chopped fresh rosemary, 1 tablespoon of fresh thyme leaves, and 1 teaspoon of dried oregano to your dry ingredients. Increase the olive oil slightly to 6 tablespoons for extra richness and that luxurious olive oil flavor. Before baking, brush the tops generously with additional olive oil and sprinkle with flaky sea salt and more fresh herbs. The aroma while these bake is absolutely intoxicating! The combination of herbs creates a complex, savory flavor that tastes gourmet but couldn't be easier to achieve. These crackers pair beautifully with vegan cream cheese, hummus, or simply enjoyed on their own. The olive oil gives them a tender, flaky texture that's distinctly different from the basic version. For variation, try using fresh basil and sun-dried tomato bits, or go Mediterranean with za'atar seasoning and a squeeze of lemon zest mixed into the dough.
2. Everything Bagel Seed Crackers
If you're an everything bagel lover, these crackers will become your new obsession! Use the basic recipe as your foundation, but mix 3 tablespoons of everything bagel seasoning directly into the dough. Then, brush the rolled-out dough with water or olive oil and sprinkle liberally with additional everything bagel seasoning on top, the combination of sesame seeds, poppy seeds, dried garlic, dried onion, and coarse salt creates that iconic flavor we all crave. Press the toppings firmly into the dough so they don't fall off during baking. These crackers have incredible crunch from all those seeds and deliver bold, savory flavor in every bite. They're fantastic with vegan cream cheese and cucumber slices, perfect for snacking straight from the container, or excellent as a crunchy salad topper broken into pieces. The seeds add not just flavor but also visual appeal and serious nutritional benefits including healthy fats, fiber, and minerals. If you can't find pre-made everything bagel seasoning, make your own by combining 1 tablespoon each of sesame seeds and poppy seeds with 2 teaspoons each of dried minced garlic, dried minced onion, and coarse sea salt.
3. Cheesy Nutritional Yeast Crackers
For those who miss the classic cheese cracker experience, this variation is pure magic. Double the nutritional yeast in the basic recipe to 1/4 cup, and add 1 teaspoon of smoked paprika for depth and a hint of that "aged cheese" flavor. Some bakers also add a tablespoon of white miso paste to the wet ingredients for extra umami punch, it intensifies that savory, cheesy quality beautifully. The dough will have a slightly golden color from all the nutritional yeast. Roll these slightly thicker than other variations, about 1/4 inch, for a texture closer to commercial cheese crackers, substantial enough to hold up to dips but still crispy. Before baking, sprinkle the tops with extra nutritional yeast mixed with a pinch of turmeric for color and anti-inflammatory benefits. These crackers are incredibly popular with kids who are transitioning to plant-based eating, and they're perfect for packing in lunchboxes. Serve them with vegan cheese spreads, guacamole, or salsa for the ultimate snack plate. The "cheesy" flavor is so convincing that even non-vegans will be impressed!
4. Spicy Herb and Garlic Crackers
For those who like a little heat with their crunch, these spicy crackers deliver! Start with the basic recipe and add 1 teaspoon of cayenne pepper, 1 tablespoon of smoked paprika, 2 teaspoons of garlic powder, 1 teaspoon of dried basil, and 1/2 teaspoon of red pepper flakes to your dry ingredients. You can adjust the heat level by increasing or decreasing the cayenne, start mild if you're unsure and work your way up. Mix 2 tablespoons of finely chopped fresh cilantro or parsley into the dough for freshness and color flecks throughout. Before baking, brush with olive oil infused with crushed garlic, or simply use regular olive oil and sprinkle with additional red pepper flakes and coarse salt. These crackers have a beautiful warm, spicy flavor that builds gradually rather than overwhelming your palate. They're absolutely incredible served with cooling dips like tzatziki-style vegan yogurt sauce, creamy avocado dip, or cashew-based ranch. The combination of spicy crackers with cool, creamy dips is sensational. These also make fantastic crouton replacements when broken into pieces and tossed on spicy soups or chilis.
5. Sweet Cinnamon Crackers (for a twist)
Not all crackers need to be savory! These slightly sweet crackers are a delightful departure from traditional recipes and they're absolutely wonderful with nut butters, fruit spreads, or simply enjoyed with tea or coffee. For this variation, swap the whole wheat flour for a combination of 1 cup all-purpose flour and 1 cup almond flour for richness. Replace the savory seasonings with 2 teaspoons of ground cinnamon, 1/2 teaspoon of vanilla extract added to the wet ingredients, and 3 tablespoons of coconut sugar or brown sugar mixed into the dry ingredients. Reduce the salt to just 1/4 teaspoon. You can add 2 tablespoons of ground flax seeds for nutrition and binding. Before baking, brush the rolled dough with melted coconut oil or a plant milk, then sprinkle generously with a cinnamon-sugar mixture (combine 2 tablespoons sugar with 1 teaspoon cinnamon). These bake up crispy and slightly sweet with warm spice notes. They're perfect for breakfast or as a dessert-like snack, wonderful spread with almond butter or cashew cream, and kids absolutely love them. For extra indulgence, drizzle cooled crackers with melted dark chocolate or sandwich them with vegan chocolate spread.

Gluten-Free Vegan Cracker Options
Going gluten-free doesn't mean sacrificing your homemade cracker dreams! With the right flour combinations and techniques, you can create crackers that are every bit as crispy and delicious as their wheat-based counterparts. The key is understanding how gluten-free flours behave differently and adjusting your approach accordingly.
Best Gluten-Free Flour Combinations
The secret to successful gluten-free crackers is using a blend of flours rather than relying on just one type, this creates better texture, flavor, and structural integrity. A winning combination is 1 cup gluten-free oat flour, 1/2 cup almond flour, and 1/2 cup tapioca starch. The oat flour provides structure and wholesome flavor, almond flour adds richness and healthy fats, while tapioca starch contributes lightness and helps achieve crispiness. Another excellent blend uses 1 cup brown rice flour, 1/2 cup sorghum flour, and 1/4 cup potato starch, this creates crackers with neutral flavor that work well with any seasoning.
For a simpler approach, use a pre-made gluten-free all-purpose flour blend that already contains xanthan gum or guar gum; these binders mimic some of gluten's properties. Bob's Red Mill and King Arthur both make reliable gluten-free flour blends that work well in cracker recipes. Chickpea flour is naturally gluten-free and works beautifully in crackers, especially when combined with other flours, try 1 cup chickpea flour with 1/2 cup oat flour for protein-packed crackers with a slightly savory, nutty flavor. Whatever combination you choose, make sure all ingredients are certified gluten-free if you're making these for someone with celiac disease, as cross-contamination in processing facilities can be an issue.
Binding Without Gluten
Since gluten provides elasticity and helps hold traditional dough together, gluten-free crackers need alternative binding strategies. Ground flax seeds and chia seeds become even more important in gluten-free recipes, increase the amount to 1/4 cup and mix them with 6 tablespoons of warm water, letting them sit for 5 minutes until gel-like before adding to your dough. This "flax gel" provides crucial binding power. Psyllium husk powder is another excellent gluten-free binder; just 1-2 teaspoons mixed into your dry ingredients can dramatically improve dough cohesion, it creates a slightly stretchy quality that makes rolling easier.
Increase the fat content slightly in gluten-free recipes, using about 1/2 cup of oil instead of 1/3 cup, as this helps the dough hold together and creates a better texture. Some bakers add a tablespoon of maple syrup or agave not for sweetness but because the stickiness helps bind ingredients. Let your gluten-free dough rest for at least 10 minutes after mixing, sometimes even 15-20 minutes, this resting period allows the flours to fully hydrate and the binding agents to work their magic, resulting in dough that's much easier to handle and less likely to crack during rolling. Patience is key with gluten-free baking!
Texture Tips for GF Crackers
Achieving that perfect crispy snap in gluten-free crackers requires a few special techniques. First, roll your dough even thinner than you would for regular crackers, aim for almost paper-thin if possible, about 1/16 inch thick. Gluten-free crackers need to be thin to get properly crispy; thicker crackers tend to remain slightly chewy in the center. Use parchment paper both under and over the dough when rolling to prevent sticking without adding extra flour that could make your crackers tough or grainy.
Bake gluten-free crackers at a slightly lower temperature, 325°F instead of 350°F, for a longer time, typically 25-30 minutes. This gentler heat allows them to dry out thoroughly and crisp up without burning. Don't be tempted to remove them too early; gluten-free crackers often need that extra time to release all their moisture and achieve maximum crunch. If your crackers still feel slightly soft in the center after the recommended baking time, turn off the oven and let them sit inside with the door slightly ajar for another 10-15 minutes to continue drying.
After baking and cooling, gluten-free crackers should be stored immediately in an airtight container with a silica gel packet if possible, as they're more prone to absorbing moisture from the air than wheat-based crackers. If they do soften, refresh them in a 300°F oven for 5-7 minutes to restore crispness. With these techniques, your gluten-free crackers can be just as satisfying and crunchy as any traditional version!
Oil-Free Vegan Crackers
For those following a whole-food, plant-based diet or simply trying to reduce fat intake, oil-free crackers are absolutely achievable! While oil contributes to flavor and that characteristic crispy, flaky texture, clever substitutions can still produce delicious, crunchy crackers that satisfy your snacking needs.
Substitutes for Oil in Crackers
Several ingredients can replace oil in cracker recipes with surprisingly good results. Unsweetened applesauce is the most common substitution, use 1/4 cup of applesauce in place of 1/3 cup of oil. It provides moisture and helps bind ingredients, though the texture will be slightly different (a bit more cake-like and less flaky). Make sure to use unsweetened applesauce to avoid adding unwanted sweetness to savory crackers.
Aquafaba, the liquid from canned chickpeas, is another excellent oil substitute that works particularly well in crackers. Use 1/4 cup of aquafaba to replace 1/3 cup of oil. The proteins in aquafaba provide binding and create surprisingly crispy results. Whip the aquafaba slightly before adding it to your dry ingredients for even better results.
Ground flax seeds or chia seeds can partially replace oil while adding healthy omega-3s and fiber. Use 3 tablespoons of ground flax or chia mixed with 1/2 cup of water instead of oil, this creates a thick gel that binds the dough effectively. Nut or seed butters like tahini, almond butter, or sunflower seed butter can replace oil in equal amounts (though they're still high in fat, they're less processed than extracted oils and come with additional nutrients). Use about 1/4 cup of nut butter in place of the oil for rich, flavorful crackers.
Some recipes use mashed banana or sweet potato, though these add distinct flavors that work better in sweet or spiced crackers rather than savory versions. The key is experimenting to find which substitute works best for your taste preferences and dietary goals.
Achieving Crispness Without Fat
Getting oil-free crackers crispy requires some technique adjustments since fat contributes significantly to crispness and prevents moisture retention. The most important factor is rolling your dough extremely thin, even thinner than regular crackers, approaching translucent if possible. Thin crackers have less moisture to release and crisp up much more effectively.
Lower your oven temperature to 300-325°F and extend the baking time significantly, sometimes up to 35-45 minutes. This low-and-slow approach allows the crackers to dry out thoroughly rather than browning quickly on the outside while remaining soft inside. Watch them carefully and remove any edge crackers that brown too quickly, returning the rest to continue baking.
After your initial baking time, turn off the oven but leave the crackers inside with the door cracked open for an additional 15-20 minutes. This extended drying time helps eliminate any remaining moisture. Some bakers even bake oil-free crackers twice, once until lightly golden, then cool them completely, and return them to a low oven for another 10-15 minutes to ensure maximum crispness.
Incorporate more seeds into your oil-free cracker dough, sesame seeds, sunflower seeds, or pumpkin seeds contain natural oils that contribute to crispness while fitting within whole-food guidelines. Use up to 1/2 cup of seeds mixed into your dough. Finally, store oil-free crackers with extra care in completely airtight containers with moisture-absorbing packets, as they're more susceptible to softening than oil-based crackers. With patience and proper technique, you can enjoy perfectly crispy, oil-free crackers that don't feel like a compromise!

Tips for Perfect Crispy Vegan Crackers
Achieving that ideal crispy, snappy texture is the hallmark of excellent homemade crackers. These expert tips will help you avoid common pitfalls and ensure your crackers turn out perfectly every single time.
Rolling Dough to the Right Thickness
Thickness is perhaps the single most important factor in cracker success. The golden rule is simple: thinner equals crispier. Aim to roll your dough between 1/8 inch and 1/16 inch thick, the thinner you can manage without the dough tearing, the better. If you have a pasta roller or pasta machine attachment, use it! Rolling your cracker dough through a pasta roller set to the thinnest or second-thinnest setting produces incredibly uniform, ultra-thin crackers with professional-level crispness.
When rolling by hand, use the parchment paper sandwich technique, dough between two sheets of parchment To prevent sticking and allow you to roll thinner without adding extra flour. Roll from the center outward in all directions, rotating your workspace rather than changing your rolling direction. Check thickness by holding a corner of the rolled dough up to the light; you should see light coming through. If some areas look darker or more opaque, they're thicker and need more rolling attention.
Remember that crackers will shrink very slightly during baking, so don't worry if your dough seems impossibly thin. Thin crackers also bake more evenly - thick spots in your dough will remain chewy while thinner areas are already perfectly crisp. Take your time with rolling; this step truly makes or breaks your cracker outcome. Once you've achieved that paper-thin consistency a few times, you'll develop the feel for perfect cracker dough thickness.
Even Baking Techniques
Uniform baking ensures that all your crackers finish at the same time with consistent color and crispness. Start by making sure your oven is fully preheated, give it an extra 10 minutes beyond when it signals it's ready, as oven temperatures can fluctuate. Use an oven thermometer to verify your actual temperature, since many ovens run hot or cold.
Position your oven rack in the center position for the most even heat distribution. If baking two sheets at once, use both the upper-middle and lower-middle positions, not the very top or bottom racks. Rotate the pans halfway through baking, switch their positions from top to bottom and turn each sheet 180 degrees. This compensates for hot spots in your oven that would otherwise cause uneven browning.
Cut your crackers to relatively uniform sizes so they bake at the same rate. If you're making different sizes for variety, group similar-sized crackers on the same baking sheet. Use light-colored baking sheets rather than dark ones; dark pans absorb more heat and can cause bottom-side burning before the tops are properly crisp.
Don't overcrowd your baking sheet, leave a little space between cracker pieces if possible to allow air circulation. While you'll score the dough into crackers before baking, you don't need to separate the pieces; they'll naturally break apart along the scored lines after baking. If you notice some crackers browning significantly faster than others, don't hesitate to remove them individually with a spatula while letting the others continue baking. This attentive approach prevents burnt crackers and ensures everything comes out perfectly.
Preventing Burning
Burnt crackers are disappointing, but this issue is easily preventable with vigilance. Never walk away from the oven during the final 10 minutes of baking, this is when crackers go from perfectly golden to burnt in just a minute or two. Set a timer for 5 minutes before your expected finish time and check on them frequently from that point forward.
Watch the edges and corners of your baking sheet most carefully, as these areas receive the most direct heat and brown fastest. If edges are browning too quickly while the center crackers are still pale, you can carefully cover just the edges with small pieces of aluminum foil to slow their browning. The undersides of crackers brown faster than the tops, so if you're unsure about doneness, carefully lift a corner with a spatula to check the bottom color.
Thin crackers (which are ideal) can go from underdone to overdone very quickly, so stay alert. If your crackers are browning too fast on top but still seem soft, lower your oven temperature by 25 degrees and extend the baking time. This gentler heat allows them to dry out and crisp up without burning.
Remember that crackers continue to crisp as they cool, so they should be just at the edge of feeling crispy when you remove them from the oven, not completely hard yet. They'll finish crisping during the cooling period. If you do accidentally burn a batch, learn from the experience: note your exact baking time and adjust downward for the next batch. Every oven is different, so developing a feel for your specific oven's quirks is part of becoming a confident cracker baker.
Achieving Uniform Crispness
Getting every single cracker crispy throughout, no chewy centers or soft spots, requires attention to detail. First, ensure your dough is uniformly thin with no thick patches. Second, dock your crackers thoroughly before baking by poking holes all over each piece with a fork. This docking is crucial, it allows steam to escape during baking so crackers don't puff up and trap moisture inside, which would create chewiness.
Make sure your crackers are cut into pieces that are roughly similar in size. Tiny crackers will burn while large ones are still baking, and very large crackers (bigger than 2 inches square) are more likely to have soft centers. If you want larger crackers for presentation, consider par-baking them, then breaking them into smaller pieces and returning them to the oven to finish crisping.
Let crackers cool completely on a wire cooling rack rather than leaving them on the baking sheet. Cooling racks allow air circulation on all sides, preventing trapped steam that would soften the bottoms. If you must cool them on the baking sheet, remove the parchment paper to prevent moisture from being trapped underneath.
Finally, resist the urge to stack or store crackers before they're completely cool, even residual warmth creates condensation when crackers are piled together, resulting in sogginess. Give them at least 30 minutes of cooling time, or even longer for thicker crackers, before packaging them for storage. Patience at this stage ensures your hard work results in crackers that stay perfectly crispy!
Serving Suggestions: What to Pair with Vegan Crackers
Homemade vegan crackers are incredibly versatile, serving as the perfect vehicle for all kinds of delicious toppings and accompaniments. Here are some inspired pairing ideas that will elevate your crackers from simple snack to impressive appetizer or satisfying meal component.
Vegan Cheese and Spreads
The classic cracker pairing! Vegan cheeses have come incredibly far in recent years, with artisan options that genuinely rival dairy cheese in flavor and texture. Serve your homemade crackers with a selection of vegan cheeses, try a creamy cashew-based brie-style cheese, aged nut cheeses with complex flavors, or tangy cultured options. Arrange them on a board with your crackers for an impressive appetizer spread.
Beyond commercial vegan cheeses, homemade spreads are wonderful. Cashew cream cheese is simple to make by blending soaked cashews with lemon juice, nutritional yeast, and seasonings, try variations with herbs, sundried tomatoes, or jalapeños. Almond ricotta brings different texture and flavor to the table. For something different, make a smoky eggplant spread by roasting eggplant until tender, then blending with tahini, garlic, and lemon, it's incredibly flavorful and pairs beautifully with herb crackers.
Hummus deserves special mention while technically a dip, spreadable hummus in various flavors (roasted red pepper, garlic, beet, white bean) transforms plain crackers into something special. Pesto, whether traditional basil or creative variations with sundried tomatoes, arugula, or kale, adds bright flavor and richness. Olive tapenade, artichoke spreads, and mushroom pâtés are also excellent choices that feel elegant and gourmet on homemade crackers.
Hummus and Bean Dips
Dips are where homemade crackers truly shine as the perfect scooping tool. Classic hummus is always a winner, but explore beyond the basic version, try black bean hummus, white bean rosemary dip, edamame hummus, or lentil dip for variety. The combination of crispy cracker and creamy legume dip provides satisfying textural contrast and balanced nutrition with plant protein, healthy fats, and complex carbs.
Baba ganoush, made from roasted eggplant, tahini, and lemon, offers smoky depth that pairs especially well with garlic or herb crackers. Black bean dip seasoned with cumin and lime is perfect with spicy crackers. White bean dip blended with roasted garlic becomes rich and luxurious, while cannellini bean dip with sundried tomatoes and basil tastes like summer in a bowl.
For parties, set up a dip bar with multiple bean-based dips, allowing guests to try different combinations with your various cracker flavors. Include different textures, smooth hummus, chunky bean dips, and rustic smashed chickpea spreads for variety. Garnish dips with olive oil drizzles, fresh herbs, toasted pine nuts, or pomegranate seeds for beautiful presentation. Your homemade crackers become the star of the show when paired with these vibrant, flavorful dips!
Fresh Vegetables and Fruits
For lighter, refreshing combinations, pair your crackers with fresh produce. Sliced cucumber, cherry tomatoes, radishes, and bell pepper strips provide crunch and brightness alongside crackers on a snack plate. Build mini cracker stacks by spreading with avocado or cashew cream, then topping with cucumber rounds, microgreens, and a squeeze of lemon, these elegant bites work wonderfully for entertaining.
Fruits might seem unexpected with savory crackers, but certain combinations are magical. Apple or pear slices with vegan cheese on crackers is a classic pairing, the fruit's sweetness contrasts beautifully with savory, herbed crackers. Fresh figs or sliced strawberries with cashew cream cheese on crackers create elegant appetizers. Grapes clustered around a cracker and cheese board add color and provide palate-cleansing freshness between bites.
For sweet crackers, fresh fruit is essential. Spread almond butter or cashew cream on cinnamon crackers and top with sliced bananas, berries, or apple slices. These combinations work beautifully for breakfast or healthy desserts. The natural sweetness of fruit complements the subtle sweetness of your crackers while adding nutrition, hydration, and beautiful color to your spread.
Nut Butters and Sweet Spreads
Sweet toppings transform crackers into satisfying snacks or light meals. Almond butter, peanut butter, cashew butter, or sunflower seed butter spread on crackers provides protein, healthy fats, and sustained energy, this combination is perfect for pre-workout fuel or afternoon pick-me-ups when you need something substantial.
Layer your nut butter crackers with additional toppings for extra deliciousness. Try banana slices with a drizzle of maple syrup, strawberry slices with chia seeds, or apple slices with cinnamon. For dessert-like treats, spread crackers with nut butter then add dark chocolate chips, dried fruit, or a sprinkle of coconut flakes, these taste indulgent while still providing actual nutrition.
Fruit preserves, jams, and spreads work beautifully on less savory crackers or your sweet cracker variations. Spread cashew cream cheese on crackers then top with raspberry jam for a sophisticated flavor combination. Date paste or fig spread on plain crackers is naturally sweet and fiber-rich. For special occasions, make chia seed jam in flavors like blueberry, strawberry, or mixed berry, it's lower in sugar than traditional jam but equally delicious and pretty on homemade crackers. These sweet applications prove that crackers aren't just for savory snacking, they're incredibly versatile!
Storage and Shelf Life
Proper storage is essential for maintaining that perfect crispy texture you worked so hard to achieve. Follow these guidelines to keep your homemade vegan crackers fresh and crunchy for as long as possible.
Best Storage Containers
Airtight storage is absolutely critical for cracker freshness. The best containers are glass jars with rubber-seal lids, like mason jars or Weck jars, these create a completely airtight environment that prevents moisture from softening your crackers. Metal tins with tight-fitting lids also work well and have the added advantage of being opaque, which protects crackers from light exposure. Plastic containers with snap-lock lids are convenient and work reasonably well, though they're slightly less airtight than glass or metal options.
Make sure your crackers are completely, totally cool before storing them, even the slightest warmth will create condensation inside your container, leading to soggy crackers. Let them cool for at least 30 minutes to an hour after baking. Once cool, transfer them gently to your container, trying not to break too many crackers in the process (though some breakage is inevitable and broken pieces are perfect for snacking).
For maximum freshness, include a food-safe silica gel packet in your storage container, these little desiccant packets absorb any stray moisture and keep crackers crispy much longer. You can purchase food-safe silica gel packets online or reuse the ones that come in vitamin bottles or other packaged products (make sure they're marked food-safe). Alternatively, place a small piece of paper towel at the bottom of the container to absorb moisture, though this is less effective than silica gel.
Avoid storing crackers in paper bags or partially open containers, as exposure to air quickly introduces moisture that softens them. If you're gifting crackers, package them in cellophane bags with tight closures or small jars with secure lids to ensure they arrive crispy and fresh.
Room Temperature vs. Refrigeration
Room temperature storage is ideal for most vegan crackers. Store them in a cool, dry place away from direct sunlight and heat sources like stoves or windowsills. A pantry, cupboard, or closed cabinet works perfectly. At proper room temperature (around 65-75°F) in airtight containers, most homemade vegan crackers will stay crispy and fresh for 1-2 weeks, sometimes even up to 3 weeks depending on the recipe and humidity levels in your home.
Refrigeration is generally not recommended for crackers, as refrigerators can actually introduce moisture despite being cold. The humid environment inside a fridge can soften crackers quickly. However, in extremely hot, humid climates where room temperature storage might be problematic, refrigeration can work if you use absolutely airtight containers and include silica gel packets. Always let refrigerated crackers come to room temperature before opening the container to prevent condensation.
The exception to the no-refrigeration rule is if your crackers contain ingredients that require refrigeration, like certain fresh herb crackers or if you've used perishable toppings. In these cases, refrigerate them in airtight containers and consume within 5-7 days. The texture might soften slightly, but you can refresh them in a low oven.
Humidity is the biggest enemy of cracker crispness, so if you live in a particularly humid climate, take extra precautions with storage. Consider storing crackers in multiple smaller containers rather than one large one, this way, you're only exposing a portion to air each time you open a container rather than your entire batch.
Freezing Crackers
Freezing is an excellent option for extending your crackers' shelf life, especially if you've made large batches. Properly frozen crackers can last 2-3 months while maintaining their quality and crispness. To freeze, first ensure crackers are completely cool. Arrange them in a single layer (or double layer separated by parchment paper) in a freezer-safe, airtight container or heavy-duty freezer bag. Remove as much air as possible from the container or bag before sealing.
Label your container with the date and cracker flavor so you remember what you have stored. When you're ready to enjoy them, there's no need to thaw, simply remove the desired amount and let them sit at room temperature for 5-10 minutes, or warm them briefly in a 300°F oven for 5 minutes to refresh the crisp texture. Some bakers prefer to freeze cracker dough rather than baked crackers, which is also an excellent strategy. Roll out the dough, cut it into cracker shapes, arrange on parchment paper, and freeze solid. Once frozen, transfer to containers or bags. You can bake these frozen cracker cutouts directly from the freezer, just add a few extra minutes to the baking time.
This approach means you can always have fresh-baked crackers with minimal effort, and the dough keeps well frozen for up to 3 months. It's perfect for when unexpected guests arrive or when you want warm crackers without the full prep process.
How to Refresh Stale Crackers
If your crackers have lost their crispy edge and become soft or chewy, don't throw them away, they're easily refreshable! Preheat your oven to 300°F and spread the crackers in a single layer on a baking sheet. Bake for 5-10 minutes, watching carefully, until they've crisped up again. Let them cool completely on the baking sheet, and they'll be restored to their original crunchy glory.
For just a few crackers, you can use a toaster oven on low heat, this is more energy-efficient than heating your full oven. Some people have success with very brief microwave reheating (15-20 seconds), though this method is less reliable and can sometimes make crackers tough rather than crispy. An air fryer also works wonderfully for refreshing crackers, use 300°F for 3-5 minutes.
The refresh method works best on crackers that have simply absorbed some moisture from air exposure. If crackers have actually spoiled (developing off odors, visible mold, or rancid taste from old oils), refreshing won't help and they should be discarded. Always use your senses, fresh crackers smell pleasant and slightly toasted, taste clean with no bitter or sour notes, and break with a satisfying snap. With proper storage and these refresh techniques, you'll rarely waste a single homemade cracker!

Nutritional Benefits of Homemade Vegan Crackers
Beyond being delicious and versatile, homemade vegan crackers can be genuinely nutritious, especially when compared to many commercial options filled with refined ingredients and additives. Understanding the nutritional advantages helps you make informed choices and optimize your recipes for maximum health benefits.
Fiber Content
One of the standout nutritional features of homemade vegan crackers is their fiber content, particularly when you use whole grain flours. Whole wheat flour, oat flour, and other whole grain options retain the bran and germ portions of the grain, which contain most of the fiber. Just one serving of whole grain crackers (about 5-7 crackers) can provide 2-4 grams of dietary fiber, contributing meaningfully to the recommended 25-38 grams per day.
Fiber is essential for digestive health, promoting regular bowel movements and feeding beneficial gut bacteria. It also helps regulate blood sugar levels by slowing down the absorption of sugars, making these crackers a much better choice than refined-flour crackers that cause blood sugar spikes. The fiber content also promotes satiety, you'll feel fuller longer after eating fiber
The fiber content also promotes satiety, you'll feel fuller longer after eating fiber-rich crackers, which helps with weight management and prevents mindless overeating. When you add seeds like flax, chia, or sesame to your crackers, you're boosting the fiber content even further. Flax seeds are particularly impressive, offering about 3 grams of fiber per tablespoon, with both soluble and insoluble types that support different aspects of digestive health.
The beauty of homemade crackers is that you control the fiber content. Want maximum fiber? Use 100% whole wheat flour, add ground flax seeds, and incorporate oats or bran. Need something lighter but still nutritious? Mix whole wheat with all-purpose flour for balance. This customization means your crackers can fit your specific nutritional needs and preferences. For comparison, many commercial crackers use refined white flour with minimal fiber, sometimes less than 1 gram per serving, making your homemade versions significantly superior for digestive health and sustained energy.
Protein from Seeds and Alternative Flours
While crackers aren't typically considered a protein source, homemade vegan crackers can actually provide a meaningful protein boost, especially when you make smart ingredient choices. Chickpea flour is a protein powerhouse, offering about 6 grams of protein per 1/4 cup, incorporating this into your cracker recipe significantly increases the protein content. Almond flour provides about 6 grams of protein per 1/4 cup along with being naturally gluten-free and rich in vitamin E.
Seeds are another excellent protein addition. Hemp hearts contain all nine essential amino acids (making them a complete protein) and provide about 10 grams of protein per 3 tablespoons. Pumpkin seeds offer 5 grams of protein per ounce, while sunflower seeds provide about 6 grams. When you mix seeds into your cracker dough or press them on top, you're creating a more nutritionally complete snack that provides sustained energy rather than just simple carbohydrates.
Ground flax seeds and chia seeds, beyond their binding properties, contribute protein as well, flax provides about 2 grams per tablespoon and chia about 2.5 grams per tablespoon. Nutritional yeast, that beloved vegan cheese flavoring, adds about 8 grams of protein per 1/4 cup along with B vitamins. When you combine these protein-rich ingredients thoughtfully, a serving of homemade crackers can provide 3-5 grams of protein, making them a more balanced snack that won't leave you hungry 30 minutes later. Paired with protein-rich dips like hummus or nut butters, your cracker snack becomes a legitimately satisfying mini-meal.
Healthy Fats
Not all fats are created equal, and homemade vegan crackers allow you to incorporate healthy fats that benefit your body. Olive oil, often used in cracker recipes, is rich in monounsaturated fats and antioxidants that support heart health and reduce inflammation. These healthy fats help your body absorb fat-soluble vitamins (A, D, E, and K) from other foods you're eating alongside your crackers.
Seeds contribute particularly beneficial fats. Flax seeds and chia seeds are exceptional sources of omega-3 fatty acids, specifically alpha-linolenic acid (ALA), which supports brain health, reduces inflammation, and promotes cardiovascular health. Sesame seeds contain sesamin and sesamolin, unique compounds with antioxidant properties. Pumpkin seeds offer omega-6 fatty acids in healthy ratios along with omega-3s. These fats are essential, meaning your body can't produce them and must obtain them from food, so incorporating them into your regular snacks is genuinely beneficial.
Nuts and nut flours, when used in crackers, provide healthy fats along with vitamin E, a powerful antioxidant that protects cells from damage. Almond flour crackers or those made with tahini (sesame seed paste) deliver these nutritious fats in delicious form. The key difference between homemade and commercial crackers is fat quality, you're choosing cold-pressed oils and whole food fat sources rather than the highly processed, inflammatory oils often found in packaged crackers. While crackers shouldn't be your primary fat source, they can contribute to your healthy fat intake as part of a balanced plant-based diet.
Vitamin and Mineral Boost
Homemade vegan crackers can be surprisingly rich in essential vitamins and minerals, especially when made with nutrient-dense ingredients. Whole grain flours provide B vitamins (thiamin, riboflavin, niacin, and folate) that support energy metabolism and nervous system function. These B vitamins are largely stripped away in refined white flour but remain abundant in whole grains. When you use fortified nutritional yeast, you're adding even more B vitamins, including B12 if the brand you choose is fortified with it, this is particularly valuable for vegans who need reliable B12 sources.
Seeds are mineral powerhouses. Sesame seeds are rich in calcium, providing about 9% of the daily value per tablespoon, along with copper and manganese. Pumpkin seeds offer impressive amounts of magnesium (essential for muscle and nerve function, blood sugar control, and bone health), zinc (crucial for immune function), and iron. Sunflower seeds contribute vitamin E, selenium, and more magnesium. Flax seeds provide manganese, thiamine, and magnesium. When you load your crackers with various seeds, you're creating a snack that genuinely contributes to your daily mineral needs.
Chickpea flour brings iron, folate, and phosphorus to your crackers. Almond flour contributes vitamin E, magnesium, and manganese. Even herbs and spices you add for flavor have nutritional benefits, garlic powder contains selenium and manganese, turmeric offers curcumin with anti-inflammatory properties, and herbs provide various antioxidants. While you shouldn't rely solely on crackers for nutrition, the cumulative effect of choosing nutrient-dense ingredients means your homemade versions offer genuine nourishment rather than just empty calories. This is snacking that actually supports your health goals!
Troubleshooting Common Issues
Even experienced bakers encounter occasional cracker challenges. This troubleshooting guide will help you identify what went wrong and how to fix it for your next batch.
Crackers Too Soft or Chewy
Soft, chewy crackers instead of crispy ones is the most common complaint, but it's easily corrected. The most likely culprit is insufficient baking time, crackers need to bake long enough to drive out all the moisture, which creates that crispy texture. Next time, bake for an additional 5-10 minutes beyond when you think they're done, watching carefully to prevent burning. Remember that crackers continue crisping as they cool, so they should feel almost completely crispy coming out of the oven, not soft.
Dough rolled too thick is another frequent cause of chewiness. If your crackers are thicker than 1/8 inch, they simply can't dry out enough during reasonable baking time to become crispy throughout. Roll thinner next time, aim for nearly translucent dough if possible. Using too much liquid in your dough can also create excess moisture that prevents proper crisping. If your dough felt very wet or sticky during mixing, reduce the water by a tablespoon or two in your next batch.
Insufficient docking (fork holes) means steam gets trapped inside the crackers during baking, creating a chewy, rather than crispy, interior. Make sure to poke plenty of holes throughout each cracker before baking. Finally, improper storage can soften initially crispy crackers, if you stored them while still warm, or in a container that wasn't airtight, moisture from the air has softened them. To rescue soft crackers, spread them on a baking sheet and refresh in a 300°F oven for 5-10 minutes until they crisp up again.
Dough Too Sticky or Dry
Dough consistency problems usually stem from liquid-to-flour ratios. If your dough is too sticky to handle, sticking to your hands and the rolling pin, you've added too much liquid or not enough flour. The fix is simple: add more flour, one tablespoon at a time, kneading it in until the dough reaches a workable consistency. It should feel slightly moist but not sticky, forming a cohesive ball that doesn't leave residue on your hands.
Alternatively, instead of adding more flour (which can make crackers tough if overdone), chill sticky dough in the refrigerator for 15-20 minutes. Cold dough is much easier to handle and roll. Always use the parchment paper sandwich method (dough between two sheets of parchment) when rolling, which prevents sticking without requiring additional flour that could toughen your crackers.
If your dough is too dry, crumbly, and won't hold together, you haven't added enough liquid. Add water or oil one tablespoon at a time, kneading thoroughly after each addition until the dough becomes cohesive. Let dry dough rest for 10 minutes after adding liquid, this allows the flour to fully hydrate, which often solves the problem without needing to add excessive moisture. Environmental factors like humidity affect dough consistency, so be prepared to adjust liquid amounts based on conditions in your kitchen. Flour also varies in absorption, whole wheat flour absorbs more liquid than all-purpose, and different brands have different protein contents that affect hydration needs. Keep notes about what works in your kitchen with your specific ingredients!
Uneven Baking
If some crackers are perfectly golden while others are still pale, or worse, some are burnt while others are underdone, you have uneven baking issues. The most common cause is inconsistent dough thickness, areas that are rolled thinner bake faster than thicker sections. Pay careful attention during rolling to ensure uniform thickness throughout. Check your rolled dough by holding it up to light; you should see relatively consistent light transmission across the entire sheet.
Oven hot spots are another frequent cause of uneven baking. Most home ovens have areas that run hotter than others, causing inconsistent results. Rotating your baking sheet 180 degrees halfway through baking helps compensate for this. If you're baking multiple sheets, also switch their rack positions midway through. Consider investing in an oven thermometer to verify your actual temperature, as ovens often run hotter or cooler than their settings indicate.
Overcrowding the baking sheet can create uneven baking, if crackers are too close together, air can't circulate properly, leading to soft spots and inconsistent crisping. Leave a little space between cracker pieces when possible. Using dark-colored baking pans rather than light ones causes the bottoms to brown much faster than the tops; switch to light-colored, heavy-duty baking sheets for more even results.
Finally, cutting crackers into dramatically different sizes means they'll bake at different rates. Keep crackers relatively uniform in size, or remove smaller, faster-baking pieces early while allowing larger ones to continue baking. Some variation is fine and adds rustic charm, but extreme size differences create baking challenges.
Crackers Breaking During Cutting
If your crackers shatter or crack when you try to cut them, your dough is likely too dry or you're cutting them at the wrong stage. For raw dough that breaks during cutting, the issue is usually insufficient hydration or over-mixing that's developed too much gluten, making the dough brittle. Add a bit more liquid to your dough next time, and handle it gently, overworked dough becomes tough and prone to cracking.
Make sure you're cutting your dough immediately after rolling, while it's still pliable. If you let rolled dough sit for too long, especially in a dry environment, the surface dries out and becomes prone to cracking when cut. Work efficiently, rolling and cutting in succession. Using a very sharp knife, pizza cutter, or pastry wheel helps create clean cuts without dragging and tearing the dough.
For baked crackers that break when you try to separate them, this is often actually a sign of success, properly crispy crackers are delicate! They should break cleanly along the scored lines you created before baking. If they're breaking in wrong places or shattering into tiny pieces, they may be overbaked and too brittle. Reduce baking time slightly next time. Some crackers will inevitably break during handling, consider this natural breakage as "baker's treats" perfect for snacking while you package the prettier whole crackers!
If you're trying to cut baked crackers (rather than scoring before baking and breaking after), stop doing this, always score your crackers before baking. Trying to cut fully baked crackers rarely works well and creates excessive breakage. Score deeply before baking, and they'll snap apart easily along those lines once cooled.

Frequently Asked Questions About Vegan Crackers
Let's address the most common questions people have when making vegan crackers for the first time, along with expert answers that will boost your confidence and success rate.
Can I make vegan crackers without a food processor?
Absolutely! While a food processor can speed up the mixing process, it's definitely not necessary for making crackers. In fact, many bakers prefer mixing by hand for better control over dough texture. Simply combine your dry ingredients in a large bowl with a whisk to ensure even distribution of seasonings and leavening. Make a well in the center, pour in your wet ingredients, and mix with a wooden spoon or your hands until the dough comes together.
Hand-mixing gives you a better feel for dough consistency, making it easier to know when to stop adding liquid or when you need a bit more. Kneading briefly by hand for 30-60 seconds ensures everything is well incorporated. The only time a food processor really helps is if you're incorporating whole seeds that you want to partially grind into the dough for more even distribution, but even then, you can pre-grind seeds in a spice grinder or mortar and pestle, then mix everything by hand. Save your money and counter space, your hands are perfectly adequate tools for wonderful homemade crackers!
How do I make vegan crackers crispy?
Achieving maximum crispiness comes down to three critical factors: thinness, thorough baking, and proper cooling. First, roll your dough as thin as possible, between 1/16 and 1/8 inch thick. The thinner your dough, the crispier your crackers will be because there's less moisture to evaporate. Use a rolling pin with parchment paper on both sides of the dough for easy handling without adding extra flour.
Second, bake until crackers are truly done, not just lightly browned. They should be golden brown, especially at the edges, and feel firm when gently pressed. Don't remove them too early, err on the side of slightly longer baking. Many recipes undershoot on baking time, leading to disappointingly soft results. Third, cool crackers completely on wire racks that allow air circulation on all sides. Crackers continue to crisp significantly during cooling, so give them at least 20-30 minutes before testing texture or storing.
Additional tips: dock your crackers thoroughly with fork holes to prevent steam from being trapped inside, use less liquid in your dough if you live in humid climates, and consider baking at slightly lower temperatures for longer times (325°F for 25-30 minutes rather than 350°F for 20 minutes) to more thoroughly dry out the crackers without burning. Store finished crackers in completely airtight containers with silica gel packets to maintain crispiness. If they do soften, refresh them in a 300°F oven for 5-10 minutes to restore the crunch!
Are vegan crackers healthier than regular crackers?
Vegan crackers aren't automatically healthier than non-vegan ones, but homemade vegan crackers definitely can be healthier than most commercial options, whether vegan or conventional. The health comparison depends entirely on the ingredients used. Store-bought crackers, both vegan and regular, often contain refined flour, excessive sodium, added sugars, preservatives, and highly processed oils, none of which contribute to good health.
When you make vegan crackers at home, you control every ingredient. You can choose whole grain flours packed with fiber and nutrients, incorporate protein-rich seeds and legume flours, use high-quality oils in moderation, reduce sodium, and avoid all the chemical additives and preservatives found in packaged products. The absence of dairy automatically means no cholesterol and often less saturated fat, though this depends on what oils you use. Plant-based ingredients typically provide more fiber than animal-product-containing recipes.
The real health advantage comes from homemade versus store-bought, not necessarily from vegan versus non-vegan. However, vegan crackers made with nutrient-dense ingredients like whole grains, seeds, legume flours, and quality plant oils offer significant nutritional benefits: fiber for digestive health, plant protein for sustained energy, healthy omega-3 fats from flax and chia seeds, vitamins and minerals from whole grains and seeds, and antioxidants from herbs and spices. Compare this to conventional store-bought crackers made with refined white flour and partially hydrogenated oils, and yes, your homemade vegan version is substantially healthier!
What flour is best for vegan crackers?
There's no single "best" flour, the ideal choice depends on your priorities like flavor, texture, nutrition, and dietary restrictions. For beginners and reliable results, a combination of 50% whole wheat flour and 50% all-purpose flour offers the best balance: good flavor, nutritious whole grains, and tender-crisp texture without being too dense. This combination is also very forgiving and easy to work with.
For maximum nutrition and fiber, use 100% whole wheat flour or whole wheat pastry flour, though crackers will be denser and have a more pronounced wheat flavor. For the lightest, crispiest texture with neutral flavor that lets seasonings shine, use all-purpose flour, it's the most like commercial crackers. For gluten-free crackers, use a combination of gluten-free flours rather than just one type: try brown rice flour plus almond flour plus tapioca starch for structure, flavor, and crispness.
Chickpea flour (besan) creates protein-rich crackers with a distinctive, slightly bean-like flavor that works beautifully with herbs and spices, it's best combined with another flour rather than used alone. Oat flour makes tender, slightly sweet crackers perfect for mild seasonings. Almond flour adds richness and healthy fats but needs to be combined with other flours for proper structure. Many experienced bakers use multi-flour blends to achieve ideal texture and nutrition: for example, 1 cup whole wheat + 1/2 cup almond flour + 1/4 cup ground flax seeds creates crackers that are nutritious, flavorful, and have excellent texture. Experiment to find your perfect combination!
Can I use coconut oil in vegan crackers?
Yes, coconut oil works well in vegan crackers! Use refined coconut oil if you don't want any coconut flavor in your crackers, or virgin/unrefined coconut oil if you like a subtle coconut taste that can complement certain seasonings like lime, ginger, or curry spices. Coconut oil should be melted before mixing into your dough, it solidifies at room temperature, so melt it gently and let it cool slightly before combining with other ingredients.
The main consideration with coconut oil is that it behaves differently than liquid oils like olive or avocado oil. Coconut oil creates a slightly more tender, flaky texture rather than crispy-crunchy, which some people actually prefer. If your kitchen is cool and the coconut oil starts solidifying while you're working with the dough, the dough may become crumbly, simply warm it slightly with your hands or let it sit at room temperature for a few minutes.
Coconut oil contains saturated fat, so while it's plant-based and vegan, it's not necessarily healthier than unsaturated oils like olive or avocado oil from a heart-health perspective. However, it's less processed than many commercial vegetable oils and does provide medium-chain triglycerides (MCTs) that some people seek for specific health reasons. It's also a good option for people with nut or seed allergies who need to avoid oils like sesame or sunflower. Use coconut oil in a 1:1 ratio to replace any other oil called for in recipes, the measurements stay the same!
How long do homemade vegan crackers last?
When stored properly in airtight containers at room temperature, homemade vegan crackers typically stay fresh and crispy for 1-2 weeks. Some recipes with higher fat content or added preservatives like vitamin E oil can last up to 3 weeks. The exact shelf life depends on your specific recipe, the humidity in your environment, and how well you've sealed your storage containers.
Crackers don't spoil in the traditional sense very quickly since they're dry and baked, but they do lose crispness as they absorb moisture from the air, becoming soft and stale-tasting. You'll know crackers are past their prime when they no longer snap when broken, taste flat or slightly stale, or have absorbed odors from your storage area. If you see any mold growth (rare but possible in very humid environments), discard the entire batch immediately.
For longer storage, freeze crackers in airtight, freezer-safe containers for up to 2-3 months. They'll maintain their quality surprisingly well in the freezer. You can also freeze unbaked cracker dough, which stays good for about 3 months and can be baked directly from frozen with just a few extra minutes added to the baking time. For maximum freshness, make smaller batches more frequently rather than one huge batch, this ensures you're always eating crackers at their peak crispness. And remember, if crackers do soften from storage, you can refresh them in a 300°F oven for 5-10 minutes to restore their crunch!
Can I make vegan crackers ahead of time?
Absolutely, and in fact, crackers are one of the best make-ahead snacks! Fully baked crackers store well and can be made several days or even weeks before you need them. For parties or meal prep, bake your crackers up to one week ahead, let them cool completely, then store in airtight containers in a cool, dry place. They'll taste just as fresh as the day you made them.
You can also prepare components ahead to save time when you're ready to bake. Make the dough, form it into a disk, wrap tightly in plastic wrap, and refrigerate for up to 2 days before rolling and baking. The resting time in the fridge actually improves flavor as the seasonings permeate the dough, and cold dough is often easier to roll thin. For even more advance preparation, roll out the dough, cut it into cracker shapes, arrange on parchment-lined baking sheets, and freeze solid. Once frozen, transfer the unbaked crackers to freezer bags or containers where they'll keep for up to 3 months. Bake them directly from frozen whenever you want fresh crackers, just add 5-7 extra minutes to the baking time.
This make-ahead flexibility makes homemade crackers perfect for entertaining, you can prepare everything well in advance without any last-minute stress. Frozen unbaked crackers also mean you can enjoy the aroma and experience of fresh-baked crackers without the full prep work each time. Whether you prefer the convenience of fully baked crackers ready to grab and go, or the flexibility of frozen dough for baking on demand, homemade vegan crackers adapt perfectly to your schedule!
What can I use instead of flax seeds?
Flax seeds serve two purposes in cracker recipes: binding the dough and adding nutrition. If you don't have flax seeds or are allergic to them, several alternatives work well. Chia seeds are the most direct substitute, use the same amount of ground chia seeds as you would flax, mixing with water in the same 1:3 ratio (1 tablespoon chia to 3 tablespoons water) to create a gel that binds the dough.
Psyllium husk powder is another excellent binding agent. Use 1-2 teaspoons mixed directly into your dry ingredients, it absorbs moisture and creates cohesion in dough. Psyllium is especially popular in gluten-free baking because it mimics some of gluten's binding properties. A little goes a long way, so start with less and add more if needed.
If you need binding but aren't looking for the nutritional profile of flax seeds, you can simply increase the oil in your recipe by 1-2 tablespoons, which helps hold the dough together. Alternatively, use 2-3 tablespoons of nut or seed butter like almond butter, sunflower seed butter, or tahini, these provide both binding and richness. Aquafaba (chickpea brine) works as a binder too; use about 2-3 tablespoons in place of one flax egg.
For crackers where you're using whole or ground flax seeds primarily for texture and nutrition rather than binding (like when they're sprinkled on top), simply substitute other seeds: hemp hearts, sesame seeds, poppy seeds, or sunflower seeds all work beautifully and bring their own nutritional benefits. The texture and flavor will be slightly different, but your crackers will still turn out delicious. Feel free to mix multiple seed types for variety and complete nutrition!
Are store-bought vegan crackers really vegan?
Most crackers labeled as vegan are genuinely vegan, but it's always worth checking the ingredient list to be certain, as formulations can change and labeling regulations vary. Truly vegan crackers contain no animal-derived ingredients: no milk, butter, cheese, eggs, honey, or animal-based additives. Many common crackers happen to be accidentally vegan because basic cracker ingredients, flour, oil, salt, and water are all plant-based.
However, watch for hidden animal ingredients that can sneak into seemingly innocent crackers. Some crackers contain milk powder, whey, or casein for flavor. Others use butter or animal-derived fats. Honey sometimes appears in slightly sweet crackers. Certain food colorings and additives like mono and diglycerides can be animal-derived, though they're often plant-sourced. L-cysteine, a dough conditioner, is sometimes derived from duck feathers or human hair, though synthetic versions exist.
The safest approach is looking for products with vegan certification logos (like the certified vegan symbol from Vegan Action or the Vegan Society's trademark) or reading ingredient lists carefully. Many popular brands like Mary's Gone Crackers, Simple Mills, and certain flavors of Triscuits and Wheat Thins are vegan-friendly. When in doubt, contact the manufacturer to ask about specific ingredients and potential cross-contamination during production.
Of course, making your own crackers at home eliminates all doubt, you know exactly what's in them because you put it there yourself! Plus, homemade versions typically taste better, cost less, and allow you to avoid the preservatives and excessive sodium common in packaged crackers. If you're serious about vegan eating, investing time in homemade crackers is absolutely worthwhile!
Can kids help make vegan crackers?
Definitely! Making crackers is a wonderful kitchen activity for kids and offers great opportunities for learning and bonding. Children can participate in age-appropriate ways: younger kids (ages 3-6) can help measure dry ingredients, pour ingredients into bowls, and press seeds onto the dough surface. They love using cookie cutters to create shapes if you're making cut-out crackers, and sprinkling toppings is always fun.
Older kids (ages 7-12) can do even more: mixing the dough, kneading, rolling out dough with supervision, cutting crackers with pizza cutters or knives (depending on maturity and knife safety skills), docking crackers with forks, and brushing on oil or water for toppings. Teenagers can handle the entire process independently with just occasional guidance, making crackers a great way to build their cooking confidence and self-sufficiency.
Cracker-making teaches valuable lessons: following recipes and measuring accurately, understanding how ingredients work together, developing patience through the rolling and baking process, and experiencing the satisfaction of creating real food from scratch. It's also more forgiving than many baking projects, if the dough isn't perfect or crackers are different sizes, they're still delicious! Kids are often more willing to try new foods they've helped create, making this a great way to introduce whole grains, seeds, and new flavors.
Safety considerations: always supervise children around ovens and hot baking sheets. Teach proper handling of sharp tools like knives and pizza cutters. Create a safe workspace with everything at the child's level if possible. Make the experience fun and low-pressure, focus on the process rather than perfect results. Kids who learn to make crackers often turn it into a regular hobby, developing lifelong cooking skills while enjoying nutritious homemade snacks!
Conclusion
Congratulations, you've just discovered that making your own vegan crackers is not only surprisingly simple but also incredibly rewarding! From crispy, golden whole grain crackers studded with seeds to creative flavor variations that rival anything you'd find in specialty stores, homemade crackers open up a world of delicious possibilities while giving you complete control over ingredients, nutrition, and cost.
Whether you're drawn to cracker-making for health reasons, budget consciousness, dietary restrictions, or simply the joy of creating something delicious from scratch, this skill will serve you well for years to come. You can customize every batch to match your current cravings, dietary needs, and what's in your pantry, no more settling for limited store-bought options or paying premium prices for tiny boxes of artisan crackers.
Remember the key principles: roll thin for maximum crispness, bake thoroughly until golden and firm, dock liberally with fork holes, and store in airtight containers to maintain that perfect crunch. Don't be afraid to experiment with different flour combinations, creative seasonings, and various seeds to find your signature cracker recipe. Some of the best kitchen discoveries happen when you trust your instincts and play with flavors!
The beautiful thing about mastering this skill is its versatility, these aren't just crackers for snacking. They're the foundation for impressive appetizers when you're entertaining, wholesome lunch box additions for kids and adults alike, crunchy salad toppers, soup accompaniments, and vehicles for all your favorite dips and spreads. Once you've experienced the satisfaction of pulling a tray of golden, fragrant crackers from your oven, you'll understand why so many people make homemade crackers a regular part of their kitchen routine.
So gather your ingredients, clear some counter space, and embrace the simple pleasure of creating something wholesome and delicious with your own hands. Your first batch awaits, and it's going to be amazing! Happy baking, and enjoy every crispy, crunchy, flavorful bite of your homemade vegan crackers!
READ MORE: