Learn how to make donuts homemade with this simple, step-by-step guide — no fancy tools or bakery experience needed! From mixing and proofing the dough to frying and glazing, this tutorial shows you how to create soft, golden, melt-in-your-mouth donuts. Whether you’re baking for fun, gifting, or selling your homemade treats, this guide helps you achieve perfect results every time.
- How to Reheat Donuts to Taste Fresh and Delicious Like New
- Can You Freeze Donuts? How to Keep Them Fresh and Delicious
- How to Store Donuts Properly: Keep Them Fresh Longer
- How Long Do Donuts Last?
Why Make Donuts at Home?

Making donuts at home offers many benefits that store-bought versions can’t match, including:
- Freshness and Quality Control:
You bake with fresh ingredients you trust, avoiding artificial preservatives and additives. You can customize sweetness, flavors, and textures to your liking. - Cost-Effective:
Homemade donuts save money compared to buying from bakeries or cafes, especially if you enjoy them frequently. - Perfect for Special Occasions:
Ideal for weekend relaxation, family gatherings, holidays, or as thoughtful homemade gifts. - Eco-Friendly Packaging Options:
Pair your homemade donuts with sustainable packaging like cake boxes or donut gift boxes. These protect your treats while demonstrating care for the environment great for gifting or storing.
How to make donuts at home

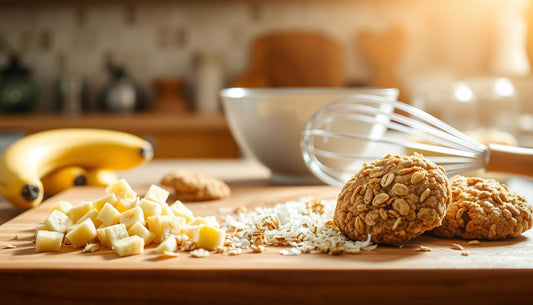
Donut Ingredients You’ll Need
- All-purpose flour: Provides the structure and texture of the donut.
- Dry yeast: Helps the dough rise and become fluffy.
- Warm fresh milk: Activates the yeast for proper fermentation.
- Granulated sugar: Adds sweetness to the dough.
- Salt: Balances and enhances the overall flavor.
- Eggs: Contribute to softness and richness.
- Unsalted butter: Adds creaminess and tenderness.
- Cooking oil: For frying the donuts to golden perfection.
- Powdered sugar: Used for dusting or making glazes.
Read more: Vanilla Cream Donuts: The Best Vanilla Cream Filled Recipe
Essential Tools and Equipment for Making Donuts
- Mixing bowl, whisk, and rolling pin for preparing and shaping the dough.
- Donut cutter or alternatives like a glass and bottle cap to shape the donuts.
- Deep fryer or non-stick skillet for frying the donuts evenly.
- Paper towels for draining excess oil after frying.
- Cooling rack to let donuts rest and cool properly before glazing or serving.
Donuts Homemade Recipe – A Step-by-Step Guide
Step 1: Activate the Yeast
To ensure your donuts rise perfectly and have that light, fluffy texture, start by activating the yeast properly.
- Warm about 120 ml (½ cup) of fresh milk until it’s pleasantly warm to the touch not hot, as high temperatures can kill the yeast.
- Add a teaspoon of sugar to the warm milk, then sprinkle in the dry yeast.
- Stir gently and let the mixture sit undisturbed for 5 to 10 minutes. You’ll know the yeast is active when the surface becomes frothy and bubbly, releasing a yeasty aroma. This step is crucial for a good rise and soft texture.
Step 2: Knead the Dough
Now it’s time to bring all your ingredients together to form the dough.
- In a large mixing bowl, combine 300 grams (about 2 ½ cups) of all-purpose flour, 50 grams (¼ cup) of granulated sugar, and a pinch of salt.
- Add two eggs, 50 grams (about 3 ½ tablespoons) of softened unsalted butter, and the activated yeast mixture.
- Mix everything until it starts coming together, then knead the dough either by hand on a clean surface or using a stand mixer with a dough hook attachment.
- Knead for about 10 to 15 minutes until the dough is smooth, elastic, and no longer sticky. Proper kneading develops gluten, which gives the donuts their chewy yet tender bite.
How to Keep Donuts from Sticking Together
Step 3: First Proofing (Rising)
Proofing allows the dough to ferment and rise, creating air bubbles that make donuts soft and airy.
- Shape the dough into a ball and place it in a lightly greased bowl.
- Cover the bowl tightly with plastic wrap or a clean kitchen towel to keep moisture in.
- Let the dough rest in a warm, draft-free place for 1 to 2 hours, or until it has doubled in size. The dough should look puffy and feel soft to the touch.
Step 4: Shape the Donuts
Once your dough has risen, it’s time to shape your donuts.
- Lightly flour your work surface and roll out the dough to about 1.5 cm (½ inch) thickness.
- Use a donut cutter to cut out rings. If you don’t have a donut cutter, use a large round cookie cutter or glass for the outer circle and a smaller cutter or bottle cap for the hole in the center.
- Place the cut donuts on a baking tray lined with parchment paper, leaving enough space between each to allow for expansion.
- Cover the donuts loosely with a clean cloth and let them rest for another 30 minutes. This second proofing helps the donuts puff up again, ensuring a light texture after frying.
Step 5: Fry the Donuts
Frying is where your donuts get their signature golden crust and irresistible aroma.
- Heat cooking oil (vegetable or canola oil works well) in a deep fryer or a heavy-bottomed pot to 175°C (350°F). Use a thermometer to keep the temperature steady.
- Carefully place a few donuts into the hot oil, making sure not to overcrowd the pan, which can lower the oil temperature and make the donuts greasy.
- Fry each side for 1 to 2 minutes, or until they turn a beautiful golden brown. Flip gently using a slotted spoon or tongs.
- Once cooked, transfer the donuts to a plate lined with paper towels to drain excess oil.
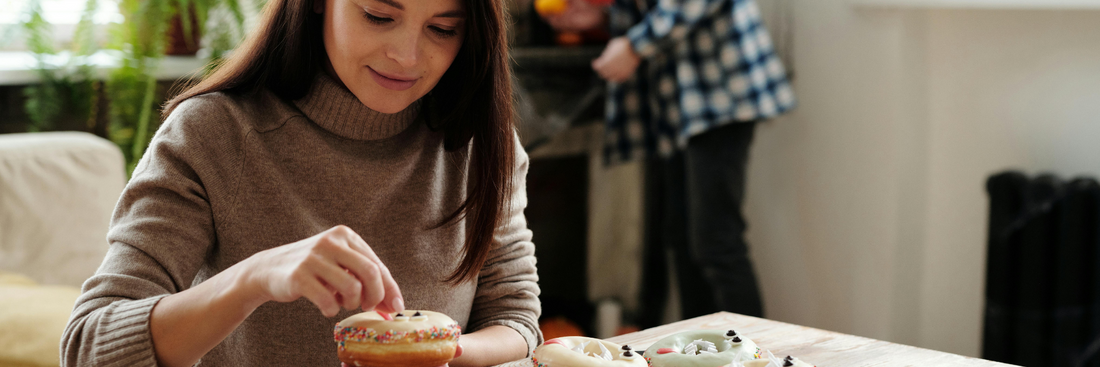
Step 6: Coat with Sugar or Glaze
The final step is to add the finishing touch that makes donuts so irresistible.
- While the donuts are still warm, roll them in powdered sugar for a classic finish. The warmth helps the sugar stick evenly.
- Alternatively, dip the donuts into your favorite glaze whether it’s a simple sugar glaze, chocolate, or a flavored icing.
- Place the glazed donuts on a wire rack to let the coating set before serving. This prevents sticky messes and ensures every bite is perfect.
Tips for Success When Making Donuts

- Use a Thermometer to Control Oil Temperature:
Maintaining the oil at the right temperature (around 175°C or 350°F) is crucial for perfectly fried donuts. Too hot, and the outside burns while the inside stays raw; too cool, and the donuts absorb excess oil and become greasy. - Avoid Overcrowding the Fryer:
Fry only a few donuts at a time to prevent the oil temperature from dropping. Overcrowding leads to uneven cooking and soggy donuts. - Ensure Proper Dough Proofing:
Let the dough rise fully during both proofing stages. Well-proofed dough results in light, fluffy donuts with an even texture. - Experiment with Different Glazes:
Don’t be afraid to try various glaze flavors like chocolate, strawberry, or matcha. This adds variety and lets you customize your donuts to your taste or occasion.
How to Make Donuts Without Molds

Donut molds or pans are great for shaping perfect donuts, but what if you don’t have one? No worries, you can still make delicious donuts at home using simple household items and a bit of creativity. Here are some easy DIY methods and tips to help you get started:
- Use a Muffin Tin and Aluminum Foil:
Transform a regular muffin pan into a donut mold by shaping small cylinders of aluminum foil to fit inside each muffin cup. These foil inserts create the donut hole and provide structure for the batter. Grease both the muffin tin and foil well to prevent sticking. This method works perfectly for baked donuts and is quick to set up. - Roll Your Own with Cookie Cutters or Glasses:
Roll out your donut dough to about 1.5 cm thick on a floured surface. Use a large round cutter or glass to cut the outer circle, and a smaller cutter or bottle cap for the hole. This classic method requires no special equipment and gives you control over donut size. - Pipe Batter Around Foil Cylinders:
For baked donuts, use a piping bag (or a zip-top bag with a corner cut off) to pipe batter around the foil cylinders in a muffin tin. This ensures even thickness and a neat shape. - Hand-Shaping for Rustic Donuts:
If you prefer fried donuts, you can shape the dough by hand into small rounds and poke a hole in the center with your finger or a small tool. While less uniform, these rustic donuts have a homemade charm and taste fantastic. - Maintain Proper Oil Temperature:
Whether baking or frying, controlling temperature is key. For frying, keep oil around 175°C (350°F) to get golden, fluffy donuts without greasiness.
These DIY methods let you enjoy fresh, homemade donuts without investing in specialized pans perfect for beginners or those short on kitchen tools.
How to Package Donuts for Gifts or Sale

- Kraft Paper Boxes:
Use sturdy kraft paper boxes to safely store and transport your donuts. These boxes provide excellent protection, preventing donuts from getting squished while maintaining freshness during transit. - Windowed Paper Bags:
For a more attractive presentation, especially when gifting, choose paper bags with clear windows. They showcase your delicious donuts beautifully, making them an irresistible gift for friends and family. - Eco-Friendly Packaging Benefits:
Choosing sustainable packaging solutions not only protects your donuts but also helps reduce environmental impact. Our eco-friendly products elevate your handmade creations, adding a professional and thoughtful touch to your presentation.
Common Questions About Homemade Donuts
Can I bake donuts instead of frying?
Yes. Bake at 180 °C (356 °F) for 10–12 minutes until golden. Brush lightly with butter for extra softness.
Why are my donuts dense?
Likely under-proofed or over-kneaded. Allow full rising time and handle dough gently.
What oil is best for frying?
Neutral oils like canola or sunflower. Avoid strong flavors such as olive oil.
How do I keep donuts from soaking up oil?
Keep oil hot enough (175 °C). Cool dough properly and don’t overcrowd the pan.
Can I freeze donuts?
Yes. Freeze after frying (without glaze). Thaw, then warm before glazing.
How long do donuts last?
1–2 days at room temperature, up to a week refrigerated, or 3 months frozen.
Conclusion
Making donuts at home is easier and more rewarding than it looks. From activating the yeast to perfecting the glaze, every step adds a personal touch that store-bought donuts can’t match.
When paired with eco-friendly packaging, your homemade treats become beautiful gifts and sustainable business products. Whether you’re baking for fun or starting a small venture, your presentation matters as much as your recipe.